Tutorials
| Gproxy Tutorial |
|---|
| GProxy tool coded by stefos007 comes with some specific features, one of them is the ability to play sounds.
For example, by default, whenever someone in your friend list joins a channel, you get a sound played, or when you receive a whisper you have a different sound.
If you want to temporarily(until gproxy.exe is closed) disable all sounds, you can type If you type !sid 19 off To enable it back, you must type: !sid 19 on For permanently disabling a sound, you should go to your Warcraft III folder and look for the gproxy.cfg file. Open it with notepad and then change the line with the sound you want to enable/disable, for example: sound_19 = 1 to sound_19 = 0 By doing so, you will permanently disable the sound it plays when a friend joins a game. Note: Remember that you can find all sounds IDs by typing !sid in any channel In the list it appears to you when you type !sid, some of the sounds come with an *(asterisk) in front, these sounds are played automatically when an event happens, for the others, you should whisper the person with/w nick send-soundFor example: If you want to slap MiZiGe, do as follows: /w MiZiGe send-slap
/hide (Hide console. You can restore with !console from chat. /sounds (enable/disable sounds) /f (send message to all your friends) /l (lock/unlock username for /re comand) /re (reply message. No need username) /v (version) /mu (mute user) /md (delete muted users) /ml (print list of muted users) /start (start warcraft 3) !sc (Automatically spoof checks to host)
CZSK
Romania
Turkey
Brasil
Safelist
Balkan
TurkDota
Egypt
Or you can look the commands up here: Gproxy:Commands You can look up all the sounds here: Gproxy:SoundId's
|
Broke link : Tutorial:Hosting Under Firewall
Broke link : Tutorial:Hosting Under Specific Firewall
| Portforwarding Router Tutorial |
|---|
| =What is port forwarding and why do you need it?=
Port forwarding (sometimes referred to as tunneling or virtual servers) is the act of forwarding a network port from one network node to another. Port forwarding allows remote computers (e.g. public machines on the Internet) to connect to a specific computer within a private LAN. So in order to host a game online, you must allow public computers on the internet to connect to your computer. If you don't port forward, all incoming connections to your PC will be refused and thus no one will be able to join your game. It is required to have forwarded ports in the following types of games:
Contents
Solution 1 (recommended)Ports which have to be forwarded: TCP 6112-6119 UDP 6112-6119
Solution 2(In case solution 1 did not work, this solution contains common steps that can be used by everyone) Hello and welcome to our port forwarding guide.
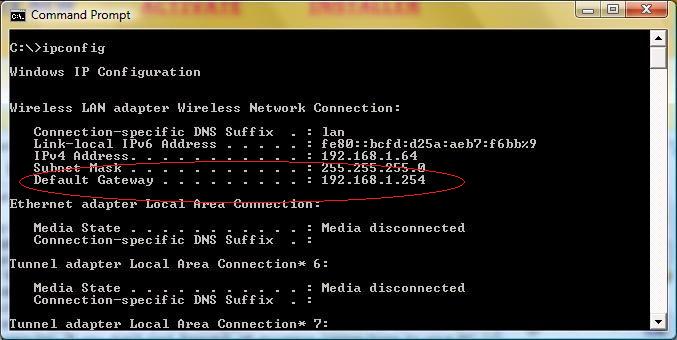
Open cmd.exe (Start > All programs > Accessories > Command Prompt) Type ipconfig, notice the Default Gateway.
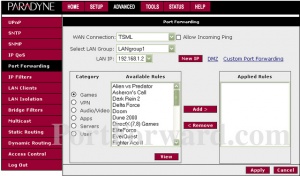
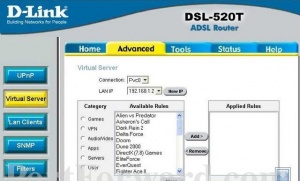
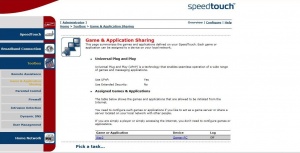
Make sure to forward both 6112 and 6113 (it is recommended to forward 6114-6119 as well). Some routers have Warcraft 3 in their database, so all you have to do is add the Warcraft 3 to the Applied Rules. If you don't have it, create a new application with the following settings: Protocol: Any Port Range: 6112-6113 Translate To: 6112-6113 Or if you don't have "Any" as a protocol type. Protocol: TCP Port: 6112-6113 Translate To: 6112-6113 Protocol: UDP Port: 6112-6113 Translate To: 6112-6113
Search for your router's brand and exact model. Follow the instructions that are specifically made for your router in order to port forward.
|
| Static Internal IP Router Tutorial |
|---|
| A -VERY- important part of setting up a Static IP address on your computer is CHOOSING an appropriate number to assign to the computer as its permanent, “static” IP address.
There’s more to it than just picking any old number at random, and the number your computer has been using up until now may NOT be an appropriate choice. This is because some routers may have trouble forwarding ports to IP addresses which conflict with their DHCP server address range. That is, if the IP address on the computer is the same as one which the DHCP server might assign, the Port Forwarding may FAIL.
So the FIRST step in setting up a Static IP address is to find out what range the DHCP server is set up for, and choosing a number that will NOT conflict with that range.
Log into your router and look for a page that tells what the DHCP Server configuration is. This is usually found under “Advanced Configuration” and then “LAN” (or similar wording). Once you’ve found the DHCP Server page there should be one of two different ways of displaying the RANGE of addresses in the server.
Thus for example if you see: Starting Address 192.168.0.100 Ending Address 192.168.0.150 The “Range” of the DHCP server is FROM 192.168.0.100 TO 192.168.0.150
Thus for example if you see: Starting Address : 192.168.0.10 Number of Clients: 50 The “Range” of the DHCP server is FROM 192.168.0.10 TO 192.168.0.60 (50 addresses, starting at 10)
You must choose a number from 2 through 254 which does NOT fall within the DHCP server range, and which does NOT duplicate the address already being used by the router (the IP address you type to log into the router)..
And in the second example you could safely choose 192.168.0.61, because these numbers are OUTSIDE of the DHCP Server range.
NOTE- This is important! The "Range" of the DHCP server is INCLUSIVE. That means when we say (just for example, your router will probably be different) : Start address 192.168.0.100 End address 192.168.0.150 It means you CAN'T USE .100 OR .150 OR ANY of the numbers between them.
BUT- there IS one situation which will require you to make a change to the ROUTER setup BEFORE you can go on.
Starting Address 192.168.0.2 Ending Address 192.168.0.254 <-- This leaves NO addresses free for YOU to use.
Starting Address 192.168.0.2 Ending Address 192.168.0.200 <-- This leaves 54 addresses free for YOU to choose.
Click the “Apply” or “OK” button, then if necessary, REBOOT the router to make the change take effect.
NOTE: VERY IMPORTANT!! We are picking the LAST set of digits in the IP address ONLY..! The FIRST THREE sets of digits MUST be the SAME as the ones the router and the DHCP server uses. Thus, if YOUR router uses 192.168.2.1, then you MUST pick a Static IP address that begins with 192.168.2 If YOUR router uses 10.0.0.1, then you MUST pick a Static IP address that begins with 10.0.0 Again- we’re ONLY changing the LAST set of digits.
Now that you’ve decided on a compatible Static IP address to use for your computer, follow this link for a guide to setting up the IP address on your computer- However- SKIP the first few steps that tell you to look in IPCONFIG for the IP address, and just use the compatible IP address you've chosen with this guide. Skip ahead to the step (#5 in the Windows XP guide) that tells you to open the Control Panel and follow the instructions from there.
Once you've finished this procedure, the address you decided on, and configured in Windows TCP/IP Network Properties will be your "Static IP Address". Whenever anything asks for your computer's Static IP Address, this number is what it's asking for.
NOTE- If your Internet connection stops working when you change Windows to a Static IP address, the reason usually is that you need to find out what your "DNS Server" addresses are. If you have this problem, read THIS guide for help on that:
|
| Static Internal IP Windows Tutorial |
|---|
| This will guide you to how to set up a static internal IP!
Before you start you need to grab some useful information for later use:
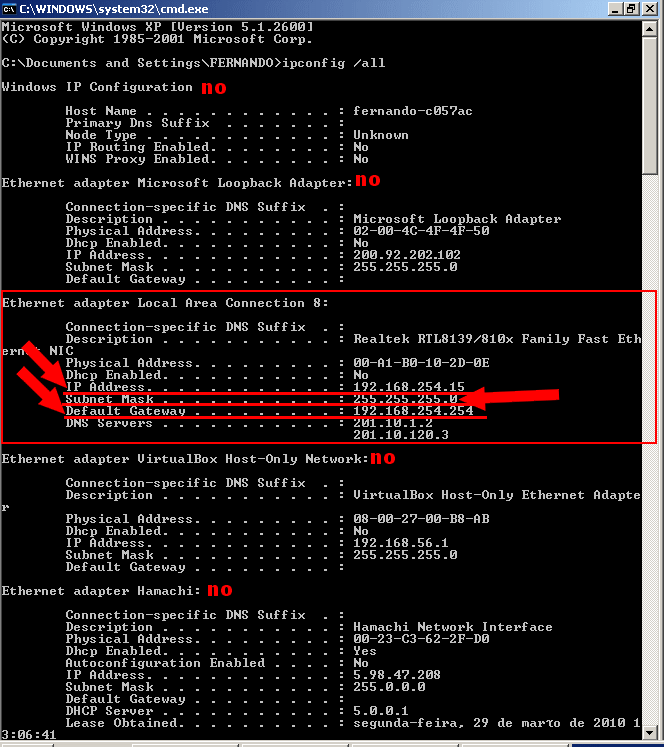
A small window will pop up. Type cmd on it and press enter. A black window will show, then type ipconfig /all and type enter. You may get various data. You must define which one is your real internet connection. On the image below you will see an example:
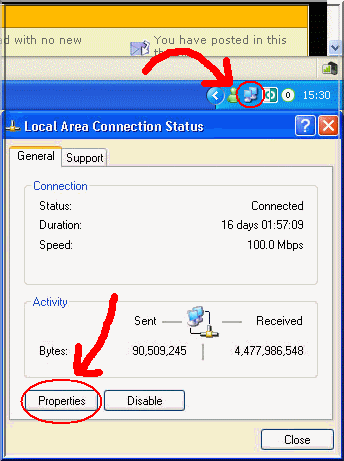
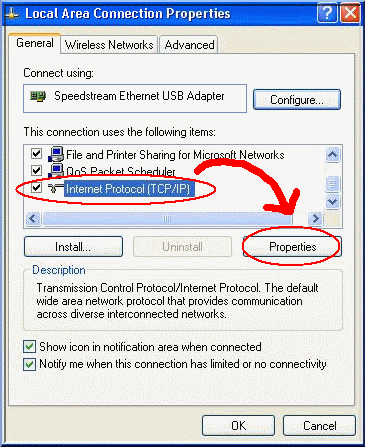
Step 2. Double click your connection on the system tray then click on Properties.
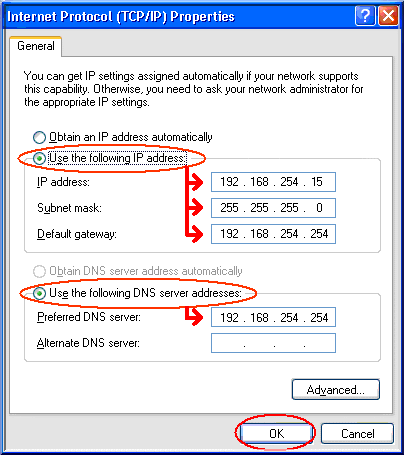
Now you're done setting up a static internal IP! You can now forward your ports to it and be free of problems.
|
| Melee maps in Ghost Tutorial |
|---|
| Package filled with all blizzard melee maps
1) Download the archive file, unzip it and put the .cfg map files in ghost/mapcfgs/ folder
C:\Program Files\Warcraft III\Maps\roc\
C:\Program Files\Warcraft III\Maps\tft\
CFG link : dotabot.net/uploads/configs.zip
|
| GhostOne map config creation Tutorial |
|---|
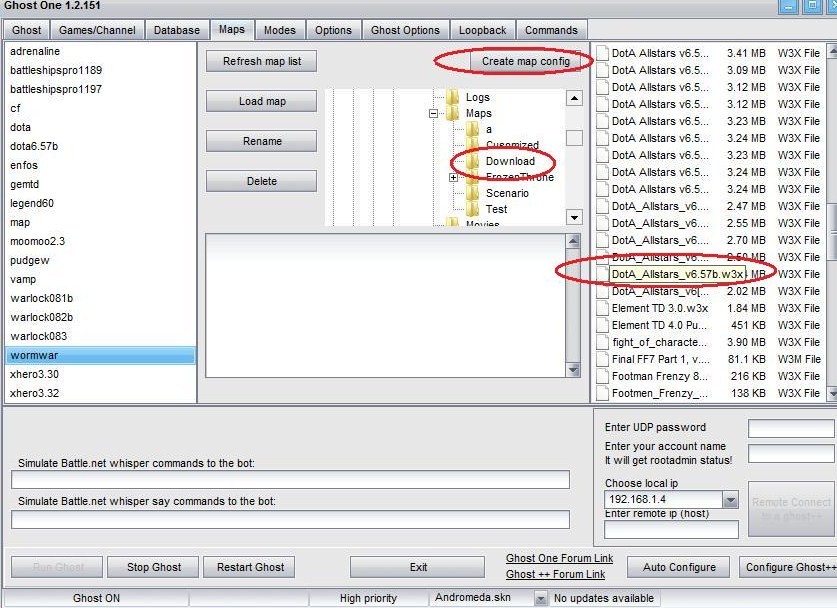
Using GhostOne - Automatic Map Creation
Second , Go to Maps
Then , Browse to the map you want to create the cfg for. Click on it and then click Create map config
|
| Own Dota Ladder with Ghost Tutorial |
|---|
[Tutorial] How to make your own dota ladder?
MAIN STEP BY STEP
FOLLOW THIS TUTORIAL EXACTLY AS IT SAYS OR YOU MIGHT ENCOUNTER ERRORS!
If you don't yet own a ghost, go and either download ghost++ or ghostOne (recommended). You can get either of them here:
Tutorials about setting up ghost and other related things can be found here:
If you don't own a server already, go download and install WAMP server:
Running linux? Get LAMP server instead.
STEP 1.2
Now left click on tray icon of WAMP server and run phpmyadmin.
In the "create new database" field, type a random name for your database, ex: dotaladder, and create the database. Make sure you remember this name because you will need it later on.
Now select the newly created database (if it's not already selected-on the menu on the left), click on Privileges tab and click on Add new user. Input your new Username, set Hostname=localhost (if you own an external server put your IP here) and Password. In the Global Privileges click on Check all to check all the boxes and hit Go button. Creating a new user is optional, you can also use pre-existing root account, but it has no password and might be vulnerable to hackers. It is recommended to set a new password for root account as soon as possible.
STEP 1.3 Now select your database again (if it's not selected already) and hit the Import tab. Open your Ghost folder and search for:
for GhostOne: mysql_create_tables_v2.3one.sql
for Ghost++: mysql_create_tables_v2.sql
File names are outdated, make sure you select the latest version that you find in your ghost folder.
Hit the Go button to import the tables.
STEP 1.4
Download and install TortoiseSVN
Restart your PC.
STEP 1.5
Now run WAMP server again, left click on tray and open www directory. Create new folder in www directory and call it whatever you want ex: allstats. Now run explorer (Go: Run>explorer) and in the map treeview search for c:\wamp\www\yourfolder folder. Right click on your folder and select SVN checkout.
In the URL of repository, copy this link: http://allstats.googlecode.com/svn/trunk/
The checkout repository must be your custom folder you made back then. Hit the Ok button to start downloading Dota Allstats source files.
This is the main part of the tutorial. To find out more about the Allstats source, visit http://code.google.com/p/allstats/
Wait for the files to download.
The following lines are necessary to be edited:
$host = 'localhost';
$username = 'TheUsernameYouCreatedInTheDatabase';
$password = 'TheUsernamePassword';
$databasename = 'TheNameOfYourDatabaseYouCreated';
$botName = 'YourBotName';
$rootAdmin = 'Bot'sRootAdmin';
Other lines are optional.
Now open PhPMyadmin and select your GHost database on the left. Select the import tab. Click choose file and select the MySQLSetup.sql file (located in your allstats folder). Click Import.
STEP 1.8
You will notice that your ladder is currently empty. In order to import all the data from your old database (if you were using sqlite so far), open GhostOne->Database->Open database (wamp server must be running! after opening the "Import from sqlite" button should appear)->Import from sqlite->Check all boxes and Import. You're done!
When importing from old database it could happen that no dota games are imported. This is because you probably weren't using the correct map cfg-s. For dota games to be saved in database, you need to open up your dota cfg, search for line map_type and set it to: map_type=dota
OPTIONAL-HIGHLY RECOMMENDED
STEP 2.1 - Hiding your IP from public
If you want to share the ladder with your friends or with public, it's recommended to hide your IP from them and all other people.
Select NO-IP Free, fill up your e-mail and sign up. Fill all the textboxes with your info and create new account. After receiving activation e-mail follow the activation link to activate your account.
After that, login and click on Host/Redirects tab. Select Add host, choose your domain name (it will include no-ip.org on the end but it's free!), choose DNS Host (A) option, enter your IP address and create the host. If you have dynamic IP you should also download and install their client which must be run everytime you reconnect to your internet. Their client will assign the correct IP to the domain, because dynamic IP changes on every reconnect.
-If you want to start WAMP server on system startup, go Run->type in "shell:startup" and make a shortcut to wamp in the folder which opens (right click on wamp shortcut, hold it and release in Startup folder->create shortcut). You can do this for any other program.
-After you succesfully setup allstats, you can uninstall Tortoise SVN, as you probably won't need it for the rest of your life if you're an average user. It'll only take your resources on startup etc. That tool is only needed to download the allstats source files.
If you encounter any errors feel free to post or PM me. (Cen)
|
| Transferring WC3-Banlist bans to Ghost Tutorial |
|---|
Automatic Method - Using GhostOne
http://img183.imageshack.us/my.php?image=80366044ew9.jpg
Finally , close the database ... and you're done !
Manual Method
If not edit it and fix the structure.
Upload your localdb.xml from WC3banlist to generate a sql file ghost.sql then import that into your ghost.dbs which will update it with records from your banlist you can import it using sqlite analyzer or any other sqlite dbms using http://sqlite.org/download.htmlsqlite command line (Windows)
ghost.dbs ".read ghost.sql"
|
| Unable to join LAN game |
|---|
Unable to join LAN gameSo your friend or brother is hosting a game and you can’t join; what to do now? There is a really cool feature in Ghost++, introduced in version 9.x which allows people on same network to play together without any problem. This feature is called the “Admin Game” and was initially designed to do a completely different job. Fortunately for us, Admin Game also solves the joining LAN games problem.
ADMIN GAME CONFIGURATION # whether to create the admin game or not (see readme.txt for more information) admingame_create = 1 the port GHost++ will host the admin game on (this must be different from your bot_hostport) admingame_port = 6114 the admin game password
Note: You need to set admingame_port in ghost.cfg to the port you want to host the admin game on. It *must* be different from your bnet_hostport *and* from your Warcraft 3 port. bot_hostport = 6000 admingame_port = 6114 Enter Warcraft, Options > Game Play > Port should be different (default is 6112)
Unable to join own or LAN game (ADSL users)Hi guys, after few weeks of trying to solve problem of joining your own game, or game created by other machine in Local Area Network (LAN), I finally managed to get it to work. PLEASE NOTE: This solution maybe not work for you! These settings are usually for ADSL users!
The solution for this problem is in general:
|
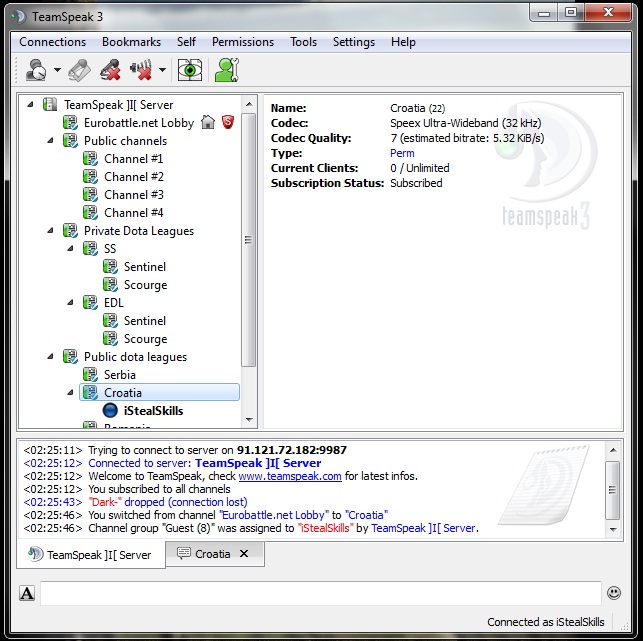
| TeamSpeak 3 |
|---|
TeamSpeak 3
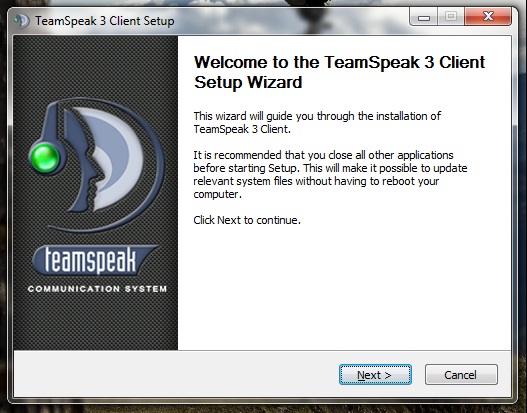
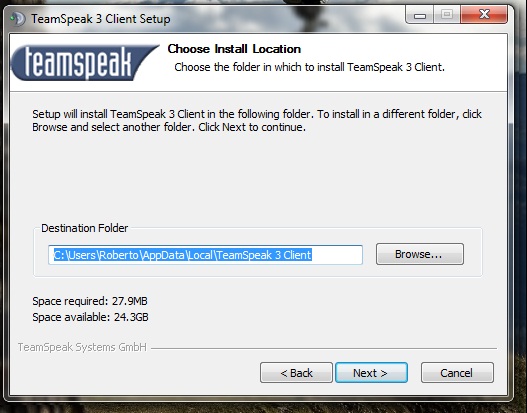
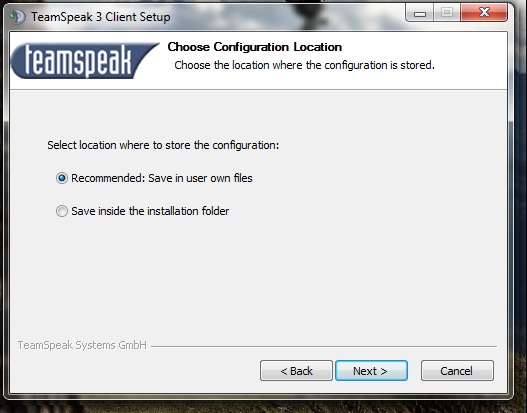
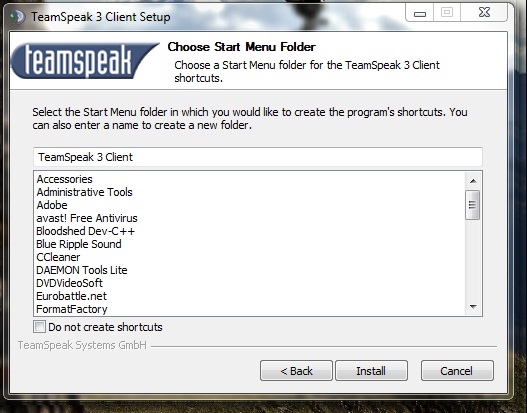
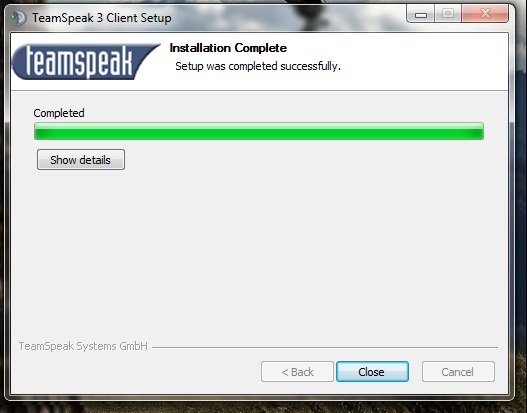
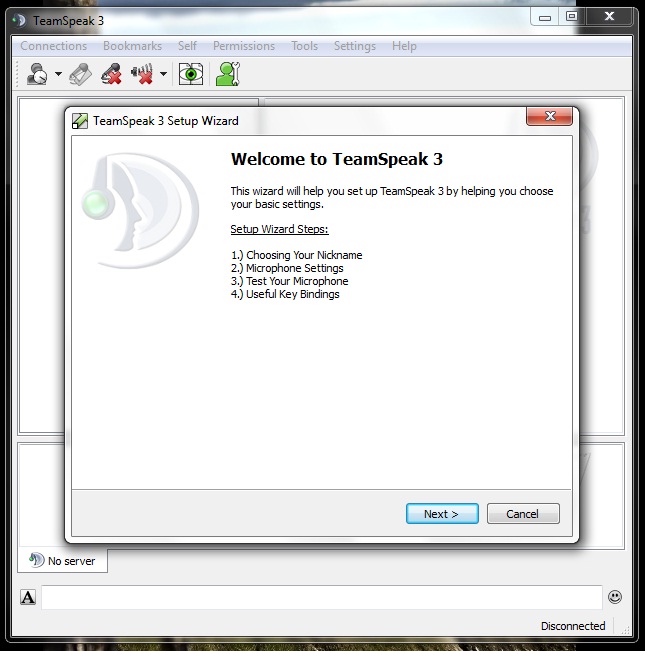
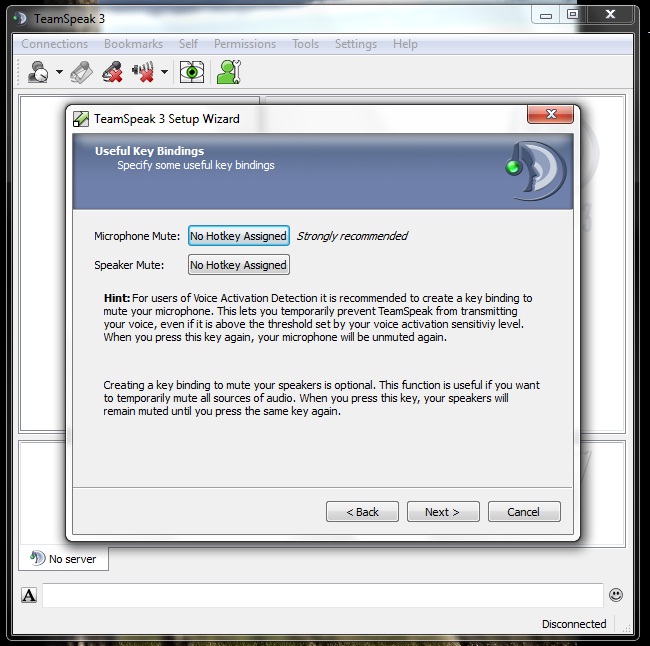
After you download client run it by clicking on icon.
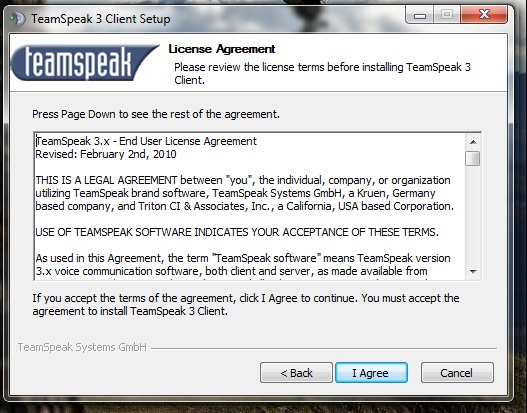
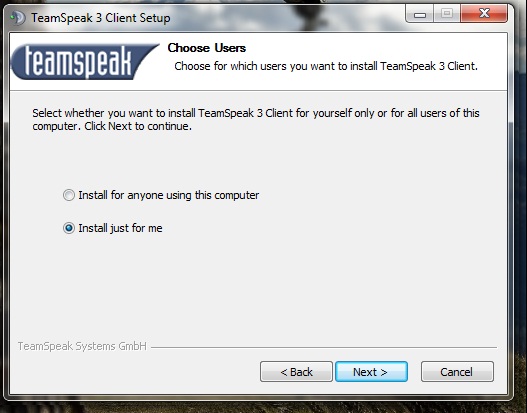
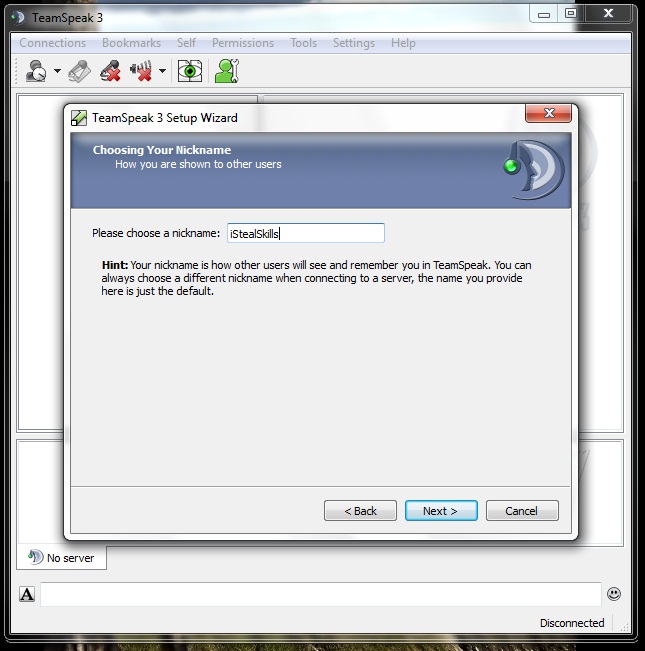
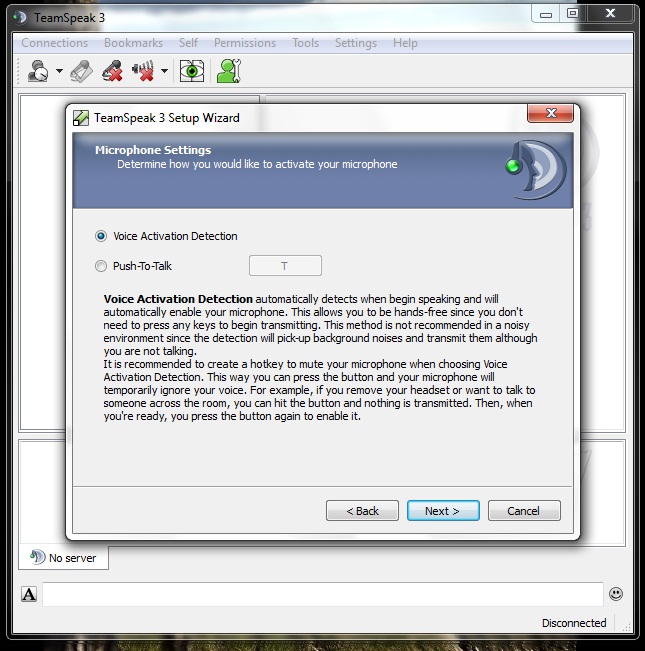
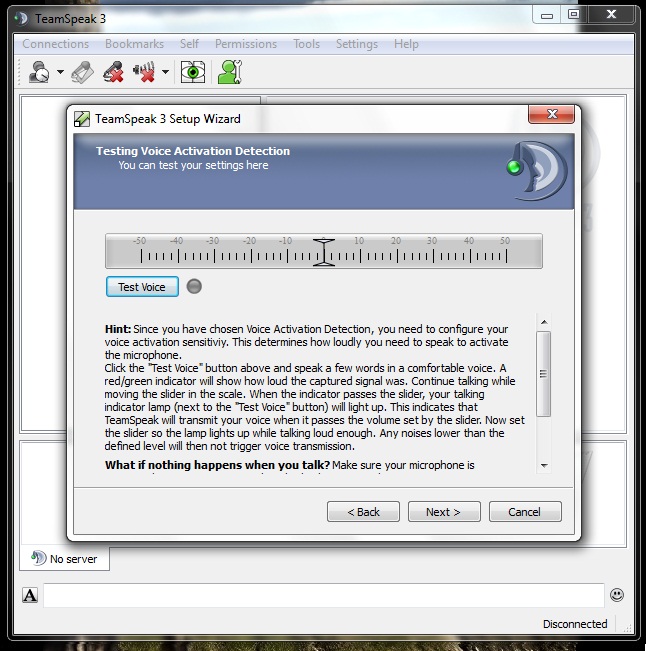
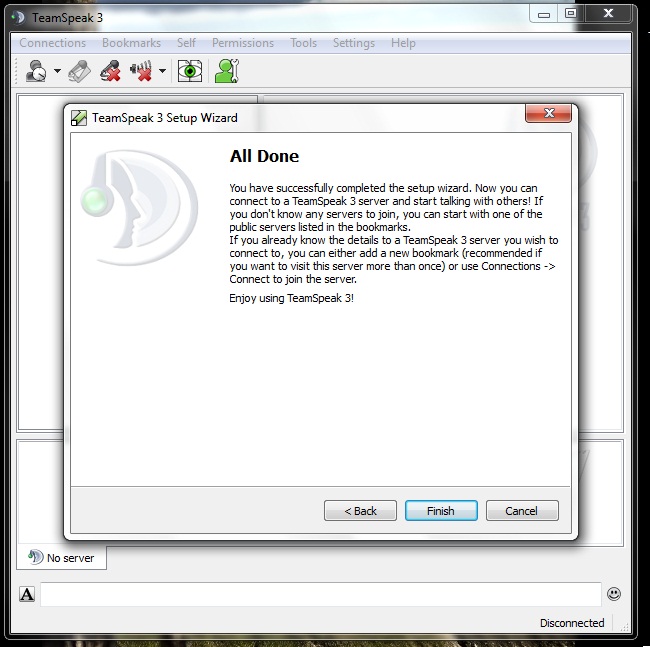
Modify as you, test it, and then click on Next.
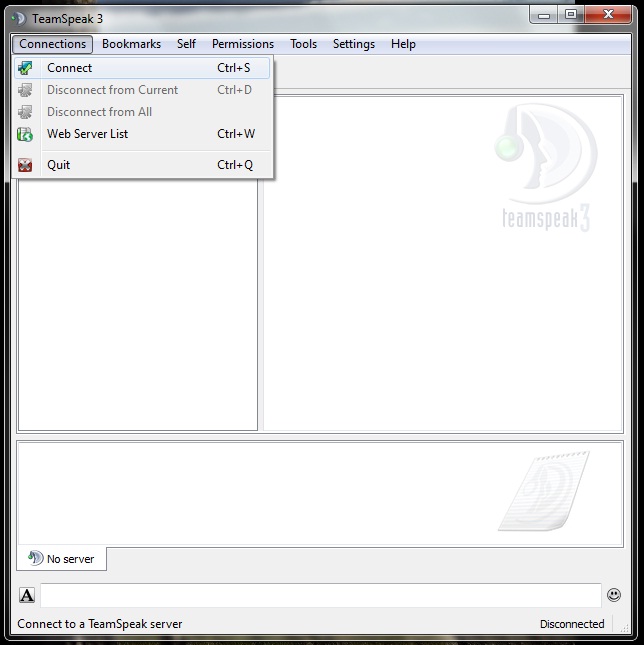
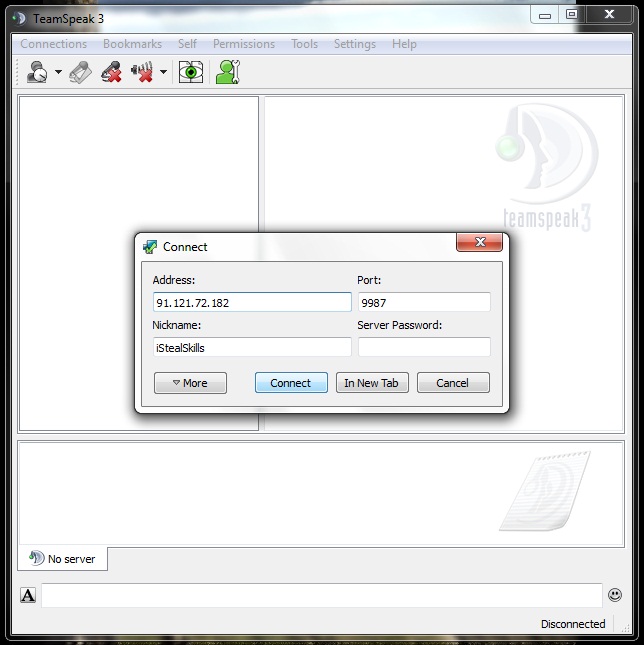
Address: ts.eurobattle.net Port: 9987 And then click on Connect.
You are connected. Select channel and enjoy.
|
| Ventrilo |
|---|
VentriloHere's a simple guide on how to connect to a ventrilo server. There is no fees, as some of you may think. First of all, I want you to know that we are not using the latest version of ventrilo, for licensing reasons. So? Let's start !
1.Download and unzip here: http://www.ventrilo.com/download.php . There is no need to install it, all the program is in one file. And if you have another version of ventrilo, there is no need to uninstall it.
2.After you unzip everything you open ventrilo.exe as shown in the picture below:
http://img135.imageshack.us/img135/2731/upicccccccccccccccccccccw2.jpg
Click on it.
You should get this if you have a newer version of ventrilo:
http://img234.imageshack.us/img234/6818/upiccccccccccccccccccccbx0.jpg
If you dont have any ventrilo program installed on your computer you should see something like this:
http://img146.imageshack.us/img146/7291/upiccccccccccccccccccccpd3.jpg
3.Click on the "->" infront of "Username:":
Put the username you want to appear to people and to identify your self. In the phonetic name put the name you want to people hear when you connect.
4.Now you need to connect to a server.
Press on New put any name you desire and press Ok.
Put the same info as in the picture: IP address: 150.254.70.99 Port number: 3784
And press Ok
Now that you've set up all ventrilo to be able to connect to our server, you can finally use it.
Just press on Connect and in couple of seconds you will be connected successfully.
If you have any problems related to this please post in the [URL="http://eurobattle.net/forumdisplay.php?f=18"]Technical Support[/URL] section.
For more information, read http://www.ventrilo.com/about.php
Note: If you are getting asked to update the version, when you open ventrilo.exe , you can solve it. Go to > Setup > Search for the tab called "Global" > Uncheck the box beside "Check for new version" > And press "Ok" - That's all !
Ventrilo on Linux
Here is how you can accomplish such a feat. so you can join your friends on a Vent server while gaming or whatever else you may use Ventrilo for.
sudo apt-get install wine
Now Vent at default requires the use of an audio codec called GSM 6.10, and from my own experience this codec/driver is not included in WINE right of the bat, so youll have to get the file msgsm32.acm
MSACM.msgsm610=msgsm32.acm
Voila! I hope this helps any of you having trouble with getting this working, also make sure to keep an eye out, the guys who develop Vent are working on a Linux client! Enjoy.
|
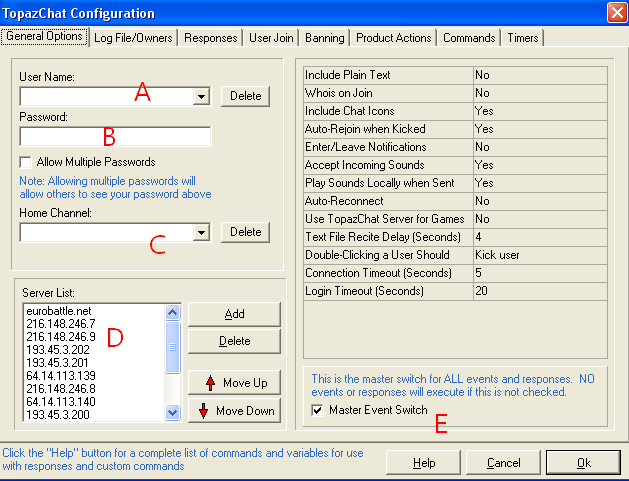
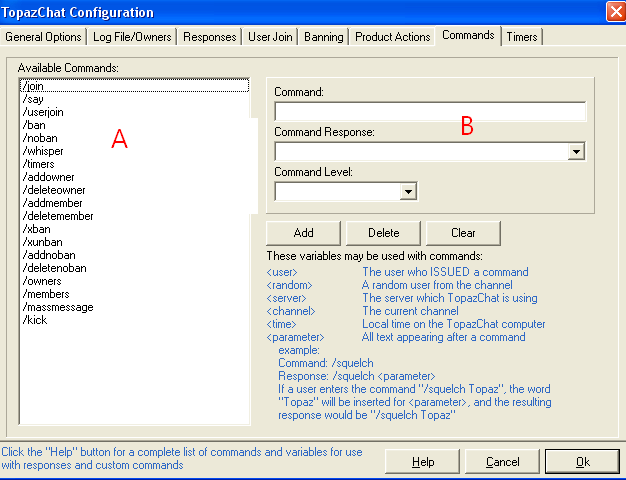
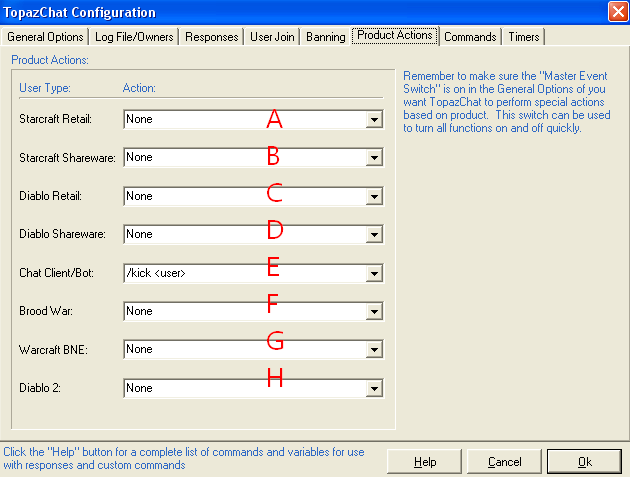
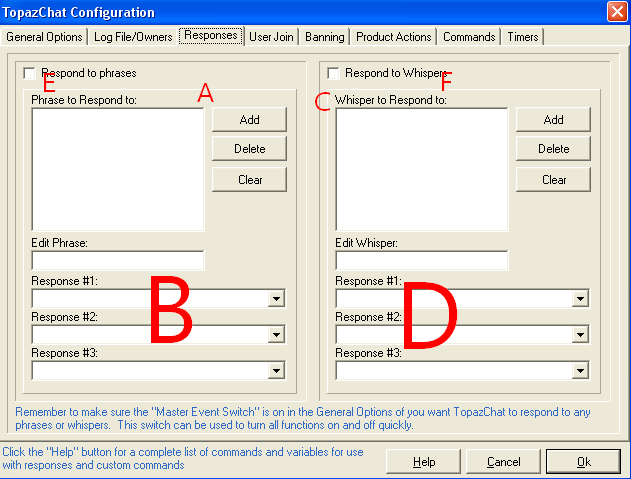
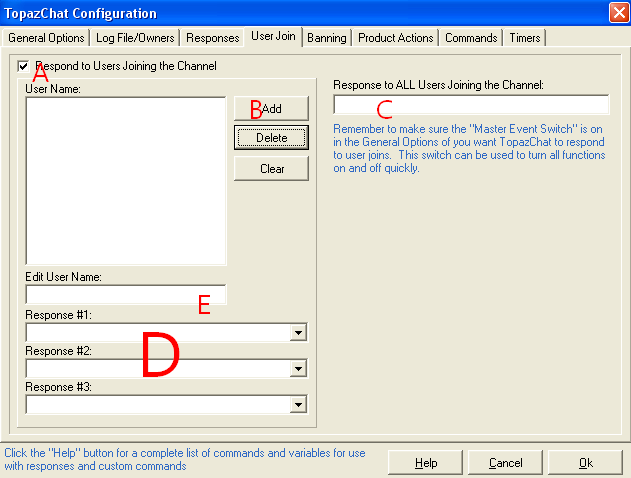
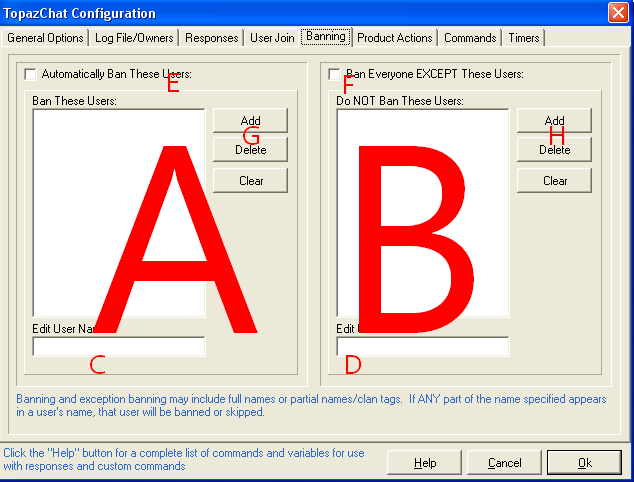
| TopazChat |
|---|
|
| Banlist |
|---|
| Banlist
http://app2.eurobattle.net/download/index.php?id=135
Getting started
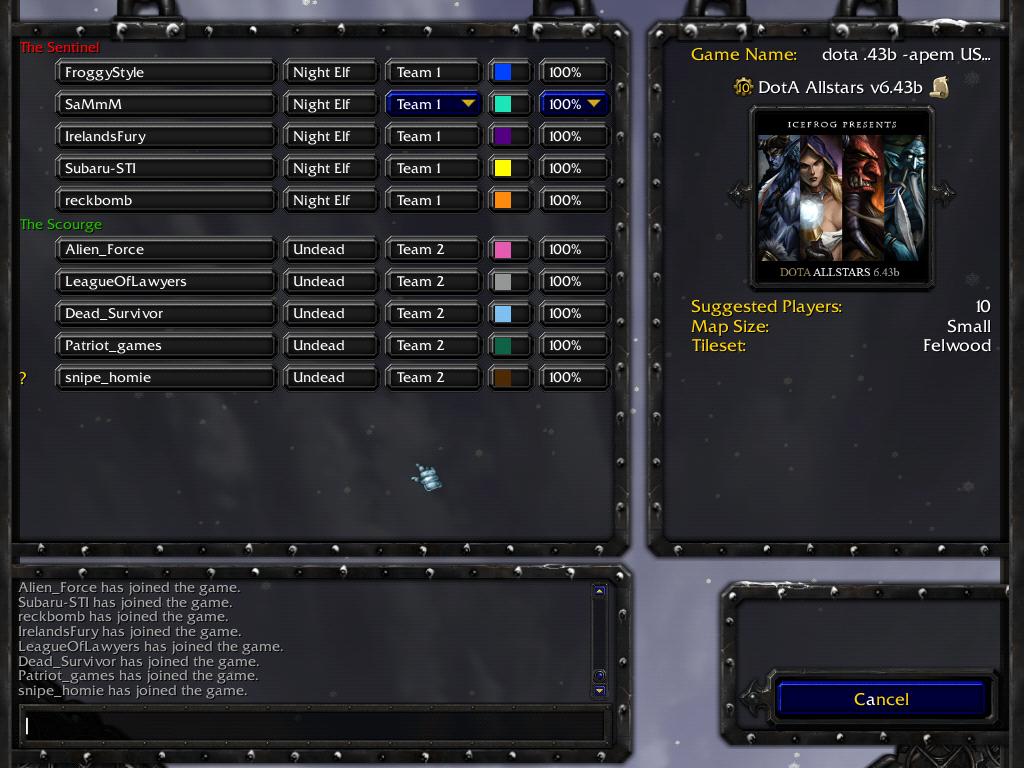
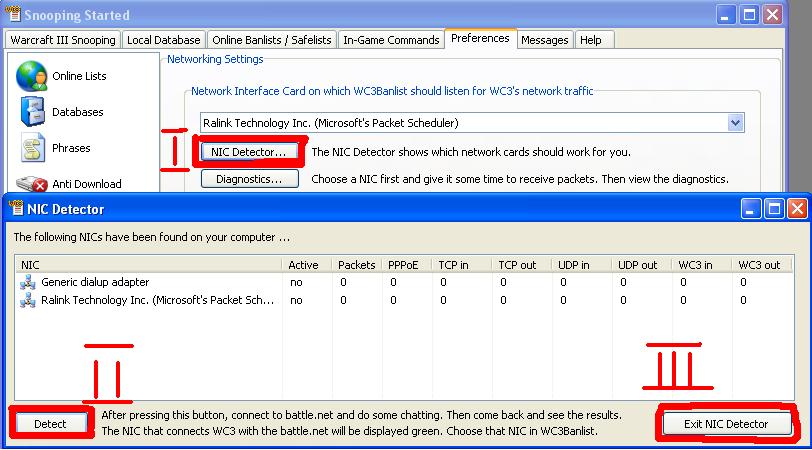
Thats all for country checking!
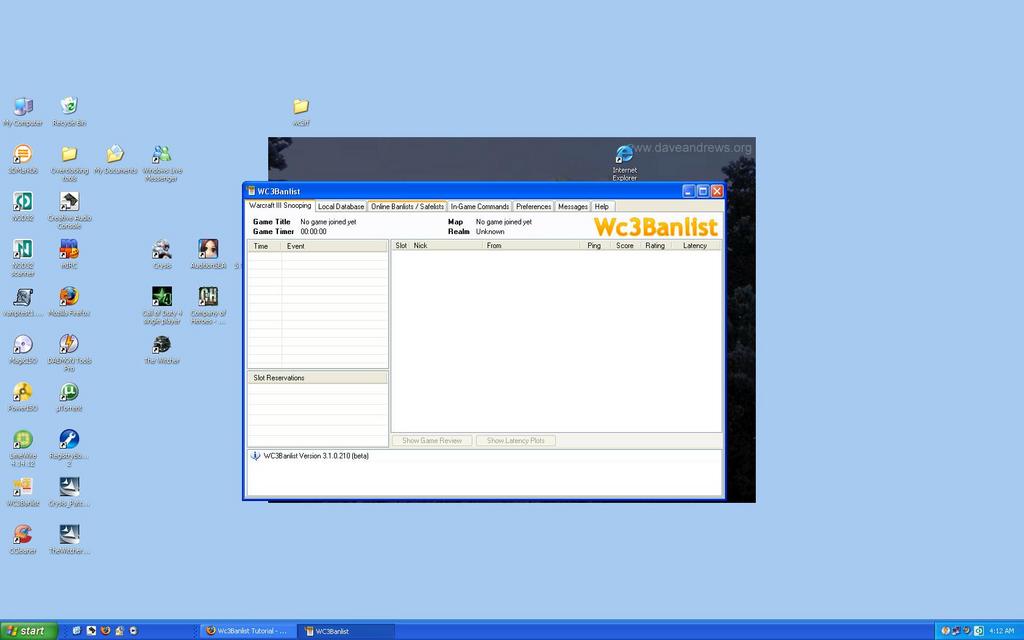
Banlisting leavers
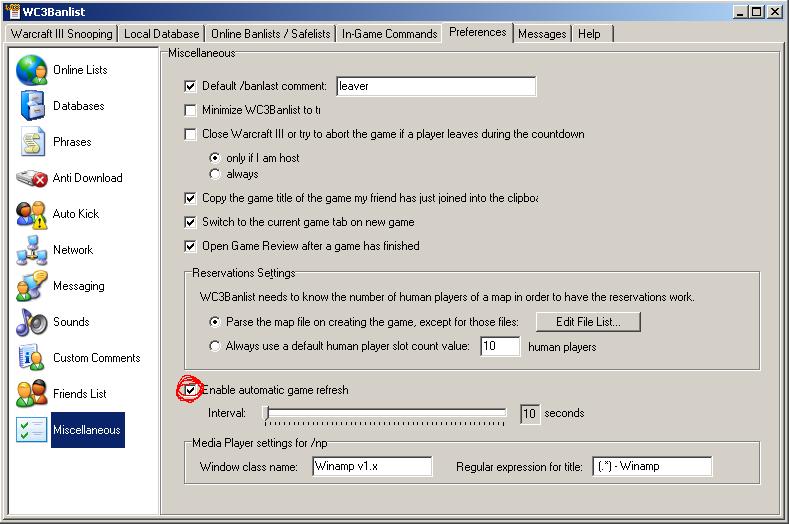
Auto refresher
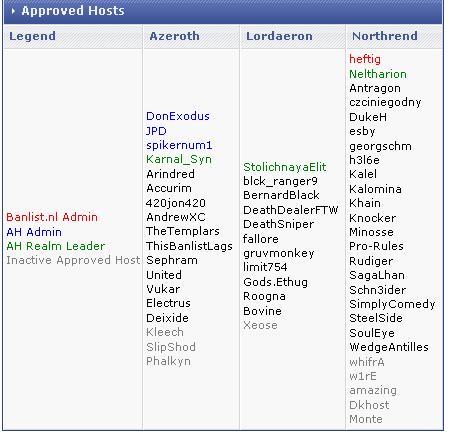
Approved host and Global banning
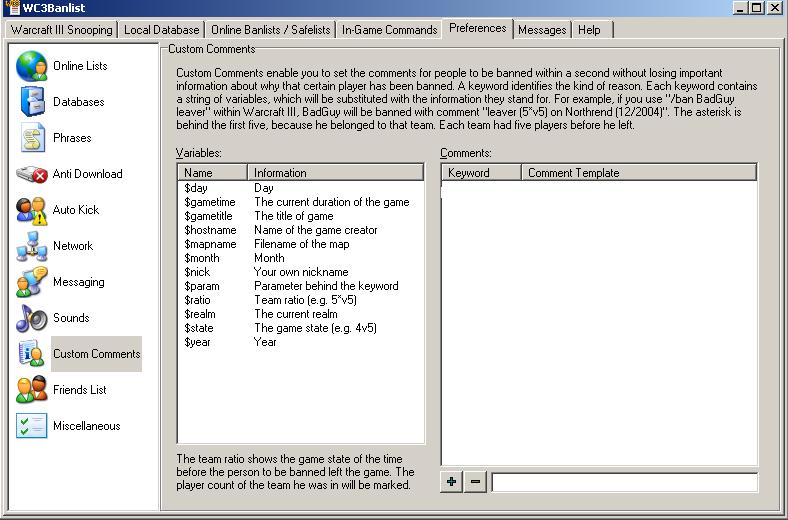
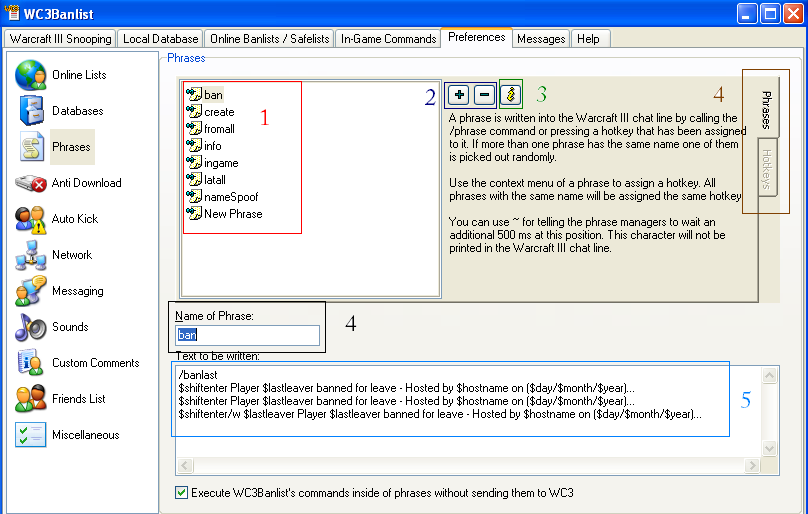
I do not encourage leavers and sore losers, i hope nobody will become bigger losers and leavers after reading this section. Adding Phrases
Phrases are very usefull if u wanna show all the time some information like the player bans or other kind of information. i will leave here all my phrases ;)
Explanation: line 1 - Ban the last leaver line 2 - Write in the chat of the game to everyone about the ban line 3 - do the same was line 2 line 4 - whisp to the leaver with the information about the ban create dota -AP eu pros Explanation: line 1 - write that information in the text fiel Is usefull for dont type everytime the game name u wanna create ;) fromall /fromall Explanation: line 1 - execute the comand fromall of the banlist info
         ALL LEAVERS, STEALERS, NUBS
                   WILL BE BANNED
                  REPORT TO UNBAN
            *****Clan banlist - XXX*****
Explanation: write this text in the game chat room for inform u are using the abnlist and u gona ban the leavers
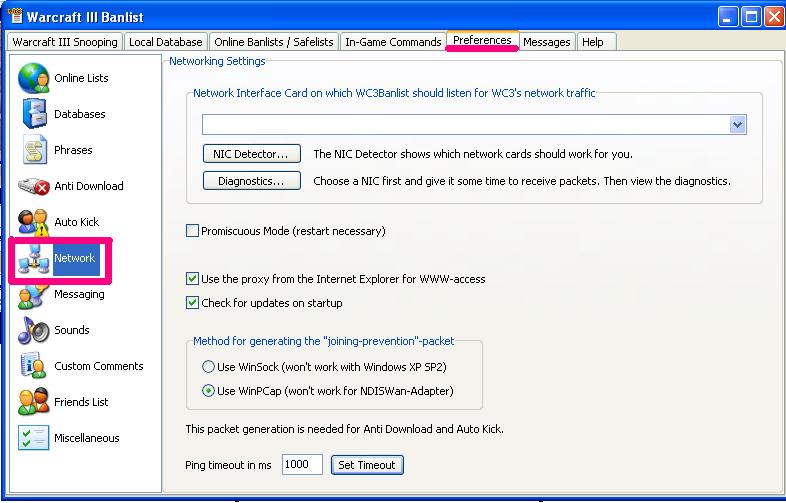
Solving Problems:
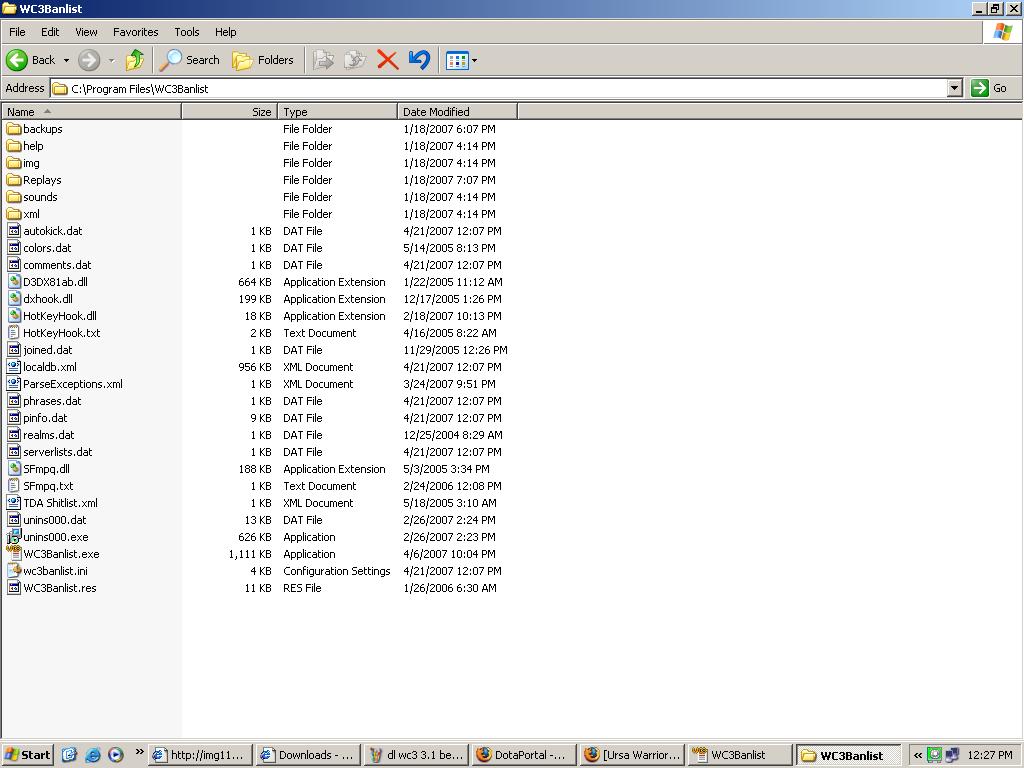
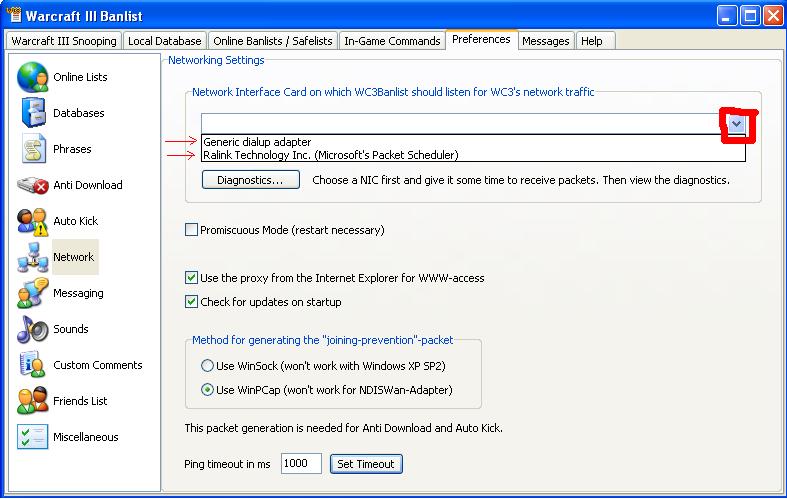
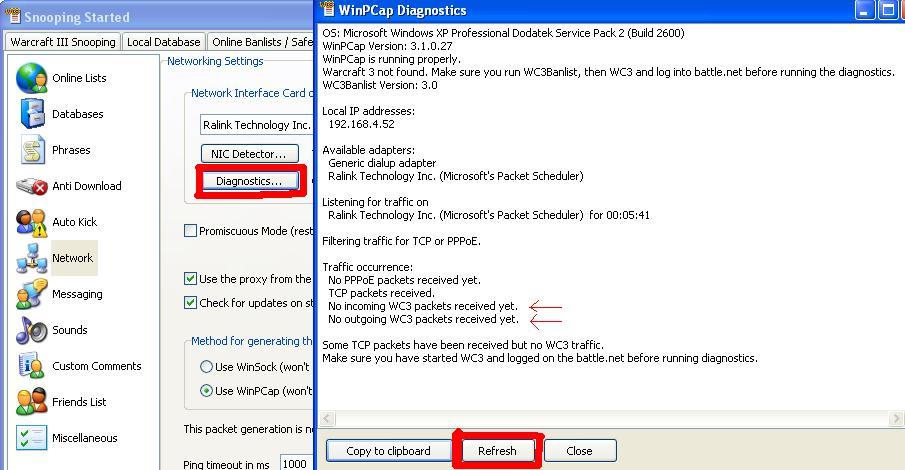
1: Network setup Network setup Place where You can dowonload Your banlist - http://app2.eurobattle.net/download/index.php?id=92. Bad Configuration? Why ? : - When You enter to Warcraft 3 TFT and You click ctrl + v text didn't paste.
simply do that like this: click right click on that icon of wc3 banlist and press the button *run as administrator*.
|
| Server Status |
|---|
| Template loop detected: Template:IncCollapse
Template loop detected: Template:IncCollapse Template loop detected: Template:IncCollapse Template loop detected: Template:IncCollapse Template loop detected: Template:IncCollapse Template loop detected: Template:IncCollapse Template loop detected: Template:IncCollapse Template loop detected: Template:IncCollapse Template loop detected: Template:IncCollapse Template loop detected: Template:IncCollapse Template loop detected: Template:IncCollapse Template loop detected: Template:IncCollapse Template loop detected: Template:IncCollapse Template loop detected: Template:IncCollapse Template loop detected: Template:IncCollapse Template loop detected: Template:IncCollapse Template loop detected: Template:IncCollapse Template loop detected: Template:IncCollapse Template loop detected: Template:IncCollapse |
| Auto War Keys |
|---|
This article is out of date, click here for the newest version
Auto War keys
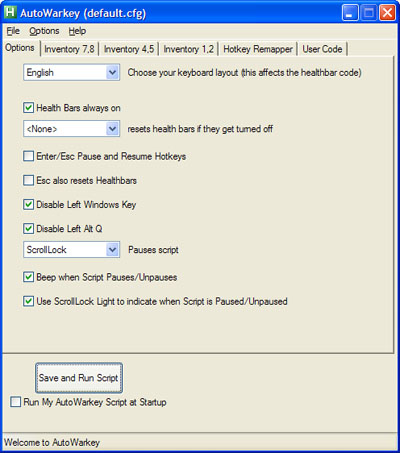
1: Link And file information :
http://warkeys.sourceforge.net/download.php
Size:9mb
Name:Auto Warkeys
Format:Executable (exe)
Features :
Edit Custom Keys for RoC TFT and DotA Allstars.
Battle.net And PvPgN Support.
Health bar always turned on.
Remap inventorys
Align keys to QWER Grid
Warkeys is a free, open-source utility for Warcraft III. With it, you can: Change the Hotkeys, Button Positions and the Tips for the icons in the game. Align the keys based on a predefined grid layout. Import your old CustomKeys.txt. Import other Warkeys config files.
Change log:
1.5.1.0b: (August 26, 2007)
- updated for Dota 6.47b
- added Faerie Dragon (thanks Marcus Johansson)
- updated Enigma's Malefice (a0b3 -> a0i7) (thanks Marcus Johansson)
- updated Axe's Berserker's Call (a0c7 -> a0i6) (thanks Marcus Johansson)
- fixed Stealth Assassin's Smoke Screen (thanks Marcus Johansson)
Warkeys Tutorial - Step by step explaination on how to utilize warkeys.
http://warkeys.sourceforge.net/tutorial.php
AutoWarkey Tutorial - Step by step explaination on how to utilize AutoWarkey the inventory remapper.
http://warkeys.sourceforge.net/tutorialA.php
Screenshots
|
| Making your own W3 movies |
|---|
This article is out of date, the information it contains can be incorrect. Please refer to the Tutorials section for a newer version.
[SIZE="1"]Posted by TP_Moonstar[/SIZE] [COLOR="DarkRed"][U][SIZE="+1"]Making your own W3 movies[/SIZE][/U][/COLOR] [spoiler][COLOR="Red"][SIZE=+1][U]Download links:[/U] [B][URL="http://w18.easy-share.com/1702331891.html"]mirror1[/URL], [URL="http://www.fraps.com/download.php"]link[/URL][/B][/SIZE][/COLOR] [U][CENTER][SIZE="5"][b][U]FRAPS[/U][/b][/SIZE][/CENTER][/U]
Benchmarking Software - Show how many Frames Per Second (FPS) you are getting in a corner of your screen. Perform custom benchmarks and measure the frame rate between any two points. Save the statistics out to disk and use them for your own reviews and applications. Screen Capture Software - Take a screenshot with the press of a key! There's no need to paste into a paint program every time you want a new shot. Your screen captures are automatically named and timestamped. Realtime Video Capture Software - Have you ever wanted to record video while playing your favourite game? Come join the Machinima revolution! Throw away the VCR, forget about using a DV cam, game recording has never been this easy! Fraps can capture audio and video up to 2560x1600 with custom frame rates from 10 to 100 frames per second! [CENTER][b]General Questions[/b] [img]http://www.fraps.com/images/general.gif[/img][/CENTER]
Selecting "Start Fraps minimized" will hide the Fraps dialog screen when you launch the program. Fraps can still be accessed through the icon in the system tray. Selecting "Fraps window always on top" will ensure the program window remains visible even when switching to another application. This option has no effect if Fraps has been minimized to the system tray. If you'd like Fraps to be loaded when you turn on your machine enable the "Run Fraps when Windows starts" option. Fraps also supports separate LCD screens on keyboards such as the Logitech® G15. If you have a supported keyboard you will see the option to "Display status on keyboard LCD". Enabling this option will allow you to see FPS graphs and other identifiers on the keyboard while playing your games. If you have a G15 but do not see this option then you may need to install the latest G15 drivers available from Logitech's website. [CENTER][b]FPS (Frames Per Second)[/b] [img]http://www.fraps.com/images/fps.gif[/img] [b]What do the options do?[/b][/CENTER] The Overlay Display Hotkey lets you assign a button that will toggle the frame rate counter between the four corners and off. To change the Hotkey, click in the box and type a new key to be assigned this function. Clicking Disable will stop the Hotkey from having any effect. The Benchmarking Hotkey lets you assign a button that can be used to determine the average frame rate between any two points in a game. To change the Hotkey, click in the box and type a new key to be assigned this function. Clicking Disable will stop the Hotkey from having any effect. The overlay corner indicates the region of the screen that the framerate counter will be displayed in. Choose a corner that doesn't obstruct important information in the game's display. If you select Disabled the frame rate counter will not be displayed on screen. Selecting "Only update overlay once a second" will only change the frame rate counter once a second. Selecting "Save frame rate to file each second" will output the frame rate once a second to the file FRAPSSEC.TXT in your Fraps directory. This option is deprecated and has been removed in Fraps 2.7.0. Use the detailed FPS statistics option to get individual CSV files for each benchmark run. The "Stop benchmark automatically" option allows you to specify a fixed duration for the benchmark. Once the number of seconds has elapsed the benchmark will automatically stop and the results will be written to disk. Finally, detailed benchmark statistics can also be saved to disk. These are written in standard CSV files that can be imported directly into a spreadsheet. All files are automatically named/timestamped and saved in the benchmarks subdirectory. Currently there are 3 files written for each benchmark when this option is enabled: * FPS - Contains the frame rate value for each second of the benchmark * frametimes - Contains the time (in milliseconds) of every frame that was rendered in the benchmark * minmaxavg - Contains the total frame count, benchmark duration, minimum, maximum, and average frame rate values. [b]What is the maximum framerate Fraps will show?[/b] Fraps will show a maximum framerate of 9999 fps on screen. If you need to know precise framerates above this you must use benchmarking and find out the value from FRAPSLOG.TXT, or from the detailed statistics (if you have this option enabled). Why doesnt Fraps show above 30fps, 60fps, 75 fps (or any other framerate) in my game? This can be due to several reasons. Many games have internal limits that prevent them rendering faster than a certain framerate. In some cases this can mean they are locked at a maximum framerate of only 30fps. Another possibility is that you have Vsync enabled. Vsync is used to synchronise the output of your graphics card with the display of your monitor. When your graphics card has finished rendering the next frame it waits for the monitor to finish displaying the current one before switching to the new one. This means that the maximum framerate you can obtain will be equal to the refresh rate of your monitor (which is usually 60hz, 75hz, 85hz, or 100hz). If you disable Vsync then your graphics card will continuously render without waiting for the last frame to be displayed in its entirety. With fast graphics cards this means that your monitor may switch to a new frame halfway down the screen. This effect is known as tearing as there appears to be a visible line separating two different halves. Due to this, you should generally leave Vsync enabled except when benchmarking. [CENTER][b]Screen Capture Questions[/b] [img]http://www.fraps.com/images/screenshots.gif[/img] [b]What do the options do?[/b][/CENTER] You can select the folder where Fraps will store all screenshots in. By default this folder is the same as the directory you installed Fraps into, but you can customise it to save anywhere on your disk. Click the Change button to select a new folder, or the View button to show the current contents of the folder. The Screen Capture Hotkey lets you assign a button that will take a screenshot of the game screen. To change the Hotkey, click in the box and type a new key to be assigned this function. Clicking Disable will stop the Hotkey from having any effect. Screenshots can be saved in Windows Bitmap (BMP), JPEG (JPG), Portable Network Graphics (PNG), or Targa (TGA) format. Selecting "Include frame rate overlay on screenshots" will include the Fraps frame rate counter on your screenshots. If the frame rate overlay is disabled, no counter will be saved on your screenshots. [b]What is the maximum resolution supported by the screen capture?[/b] Screenshots can be taken in games running at resolutions up to 2560x1600. [CENTER][b]Video Capture Questions[/b] [img]http://www.fraps.com/images/movies.gif[/img] [b]What do the options do?[/b][/CENTER] You can select the folder where Fraps will store all movies in. By default this folder is the same as the directory you installed Fraps into, but you can customise it to save anywhere on your disk. Click the Change button to select a new folder, or the View button to show the current contents of the folder. The Video Capture Hotkey lets you assign a button that will record movies of the game. To change the Hotkey, click in the box and type a new key to be assigned this function. Clicking Disable will stop the Hotkey from having any effect. Choosing Half-size will store the movie at half the resolution of the game screen. Full-size will store the movie at the same resolution as the game screen up to 1152x864. You can choose the frame rate of the output movie from 25fps, 30fps, 50fps, 60fps, or a custom value up to 100fps. Higher values result in smoother playback but will increase the file size. Some video editing programs will treat movies recorded at 25fps as PAL, and those captured at 29.97/30fps as NTSC. Selecting "Record Sound" will save the game audio along with the video. You can disable this option if you are planning to add your own sound to the video. When you select "Detect best sound input" Fraps will determine the best input to record the game sound on. If you choose "Use Windows input" the default Windows recording input will be used. The Windows input may not capture all of the game sounds, so you should generally let Fraps detect the input unless you want to capture sound from an external source. [b]How do I record a movie while running a game?[/b] First select the target framerate for the movie, which indicates how many frames will be included in the movie each second. You can currently choose from 25, 30, 50 or 60 fps. In the game press the Video Capture Hotkey (F9) when you want to start recording. While recording the frame rate counter will turn red. When you want to end your movie, press the button again to stop recording. You will now find the movie saved in your default folder. [b]Why do I get a source format error when I try to compress with DIVX?[/b] Divx6 places restrictions on the video resolution for many of its profiles and this may cause an error when handling large Fraps videos. In Virtualdub you can go to the Divx codec configuration screen and set it to use the "Unconstrained Profile". This will allow you to encode movies of any resolution and won't generate the source format error. [b]How can I adjust the volume of the sound that is recorded?[/b] You must configure the volume through the "Sounds and Audio Devices" item in the Control Panel. Use the following steps: * Click on the Control Panel and select Sounds And Audio. * Click on the Audio tab. * Find the Sound Recording device and click Volume. * Adjust the volume for the Input that Fraps is recording from. This is usually named "What U Hear", "Record Master", or "Stereo Mixer". If you can't see the correct Input on screen you may need to enable it by clicking on Properties in the menu and ensuring all Inputs have a check beside their name. Where can I find the custom Fraps FPS1 codec? The Fraps codec (FPS1) is put on the system when you install Fraps. If you've reinstalled Windows you will also need to reinstall Fraps in order to play back your movies. Please keep in mind that if you want to give your raw footage to another person they will also need to have Fraps installed. [I][center][SIZE=-1]All credits goes to [URL="http://www.eurobattle.net/member.php?u=703354"]phantom.[/URL] and [URL="http://www.eurobattle.net/member.php?u=893654"]smaree[/URL] and whoever helped in this guide.[/SIZE][/center][/I][/spoiler] [SIZE="1"]Posted by TP_Moonstar[/SIZE]
|
| Stealth bot |
|---|
| What is StealthBot
StealthBot is one of the most popular moderation bots on the official servers. It completely emulates the Battle.Net Chat Server connection, meaning; A server will clearly think you're an official client. It's written in Visual Basic v6, meaning it's for Windows only (Bypass is possible.) It's possible to extend StealthBot with Visual Basic Script-scripts to get advanced option and a broad enterprise of extra features. Where to download? You can download the release version Through This Link http://www.stealthbot.net/wiki/Download. (Develops version) The other steps. After installing make sure you do not start StealthBot. Preparing StealthBot for PvPGN connection Go to the StealthBot root folder Open Default/scripts Download this file http://www.mediafire.com/download/klekolotqjfsevh/PvPGN.rar (Right click -> Save source to your StealthBot/Default/scripts directory.) Now you're able to connect to Eurobattle.net! Advanced users (That's what they state) Go to the StealthBot root folder Create a folder called: WAR3 Go to the Warcraft root folder Copy: war3.exe / Storm.dll / game.dll to the Stealthbot/WAR3 folder Go to StealthBot/Default and create a file called: Config.ini Open it and place the Spoiler-text in it and save it. (Note; Folder can need special access. Create it on your desktop then copy to your StealthBot/Default folder if it doesn't work.) [Main]
ShowWhisperWindow=Y
Product=PX3W
CDKey=FFFFFFFFFFFFFFFFFFFFFFFFFF
ExpKey=FFFFFFFFFFFFFFFFFFFFFFFFFF
Server=server.eurobattle.net
Trigger={.}
ConfigVersion=5
ShowSplash=Y
MaxBacklogSize=10000
MaxLogFileSize=0
WhisperBack=N
ConnectOnStartup=N
MinimizeOnStartup=N
UseBackupChan=N
DoNotUseDirectFList=N
URLDetect=Y
ShowOfflineFriends=N
LogDBActions=N
LogCommands=N
UseBNLS=N
Spoof=0
ReconnectDelay=1000
Protect=N
UseWWs=N
[Other]
JoinLeaves=Y
Filters=Y
FlashWindow=N
Timestamp=1
Logging=2
NoTray=Y
NoColoring=N
ProfileAmp=N
Mail=Y
DisablePrefix=N
DisableSuffix=N
AllowMP3=Y
ChatFont=Tahoma
ChatSize=8
ChanFont=Tahoma
ChanSize=8
NamespaceConvention=0
ShowStatsIcons=Y
ShowFlagsIcons=Y
[Override]
W2VerByte=4F
SCVerByte=D3
D2VerByte=0D
W3VerByte=1A
SpawnKey=N
Difference between preparing and advanced; Using the first method makes the login sequence slower. It's not a must-do, though.
I wish you good luck with StealthBot.
|
