Tutorials
| Gproxy Tutorial |
|---|
| GProxy tool coded by stefos007 comes with some specific features, one of them is the ability to play sounds.
For example, by default, whenever someone in your friend list joins a channel, you get a sound played, or when you receive a whisper you have a different sound.
If you want to temporarily(until gproxy.exe is closed) disable all sounds, you can type If you type !sid 19 off To enable it back, you must type: !sid 19 on For permanently disabling a sound, you should go to your Warcraft III folder and look for the gproxy.cfg file. Open it with notepad and then change the line with the sound you want to enable/disable, for example: sound_19 = 1 to sound_19 = 0 By doing so, you will permanently disable the sound it plays when a friend joins a game. Note: Remember that you can find all sounds IDs by typing !sid in any channel In the list it appears to you when you type !sid, some of the sounds come with an *(asterisk) in front, these sounds are played automatically when an event happens, for the others, you should whisper the person with/w nick send-soundFor example: If you want to slap MiZiGe, do as follows: /w MiZiGe send-slap
/hide (Hide console. You can restore with !console from chat. /sounds (enable/disable sounds) /f (send message to all your friends) /l (lock/unlock username for /re comand) /re (reply message. No need username) /v (version) /mu (mute user) /md (delete muted users) /ml (print list of muted users) /start (start warcraft 3) !sc (Automatically spoof checks to host)
CZSK
Romania
Turkey
Brasil
Safelist
Balkan
TurkDota
Egypt
Or you can look the commands up here: Gproxy:Commands You can look up all the sounds here: Gproxy:SoundId's
|
| Installing Eurobattle |
|---|
| Eurobattle.net provides its services to all users, no matter if they have a licensed copy of the game or not. If you don't have the license keys, Eurobattle.net Client will provide you with temporary ones which will let you connect to our servers.
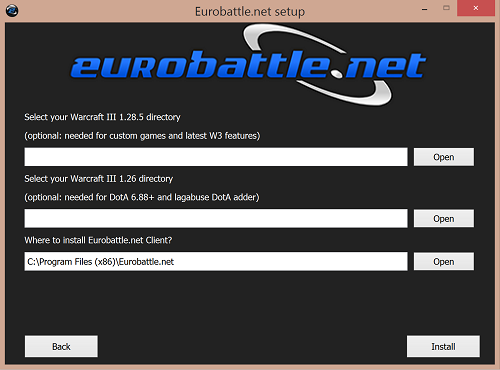
1) Make sure that you have Warcraft III 1.28.5 or 1.26a installed on your computer. 2) Download and install Visual C++ Redistributable 2013 and Visual C++ Redistributable 2015 x86 here or from the official Microsoft site unless you have them already. These frameworks are required in order to be able to use our Client. 3) Download the newest Eurobattle.net installer 4) Unzip the installer and launch it. 5) Progress through the installation, make sure to select the desired Warcraft III path and the path you want the Client to be installed to: Note that the path MUST contain only English characters. 6) After the installation has been successfully completed, the Client's shortcut will appear on your desktop: 7) Launch the Client and wait patiently until it patches your game (if necessary). You might be asked to confirm the installation of patches (their size varies from ~50 MB to ~950 MB).
|
Broke link : Tutorial:Getting Started
| Improve your FPS |
|---|
You are experiencing lags and shuttering? It might be a FPS problem then, you can check it by typing "/fps" in game. This is what you can do to increase it.
Contents
Update Video Card DriversMake sure that your video card drivers are up to date. Driver developers are constantly optimizing their products and newer drivers may provide a better performance.
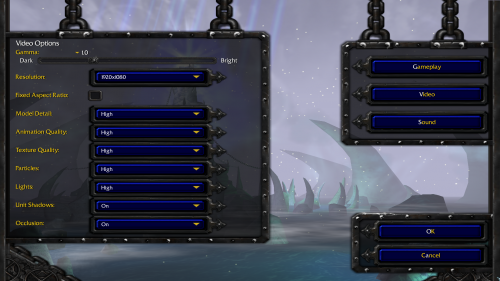
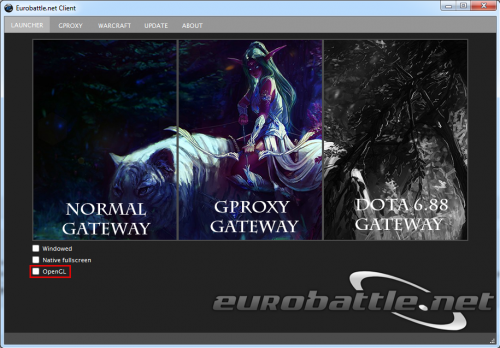
Change Ingame Video SettingsYou also may want to adjust your Warcraft III video settings in order to increase your ingame FPS. Open them by launching your game and going to "Options" -> "Video" from the main menu. Setting a lower Resolution may greatly improve the performance but it also may make it harder and unusual to play the game. It is recommended to start by disabling Shadows and lowering Ligths and Particles quality. Test different setups to find out which one delivers a decent amount of FPS and doesn't obstruct your gameplay. Switch Rendering ModeYou may try switching the rendering mode too. Warcraft III runs using the DirectX technology by default, however, you may switch it to OpenGL which will slightly improve the performance. To do that, tick the OpenGL box in Eurobattle.net Client and restart your game. Your game will be launched with the "-opengl" parameter from now on.
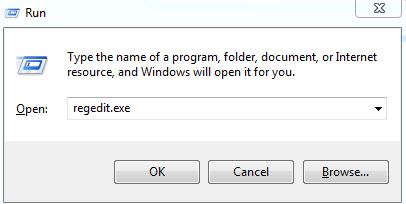
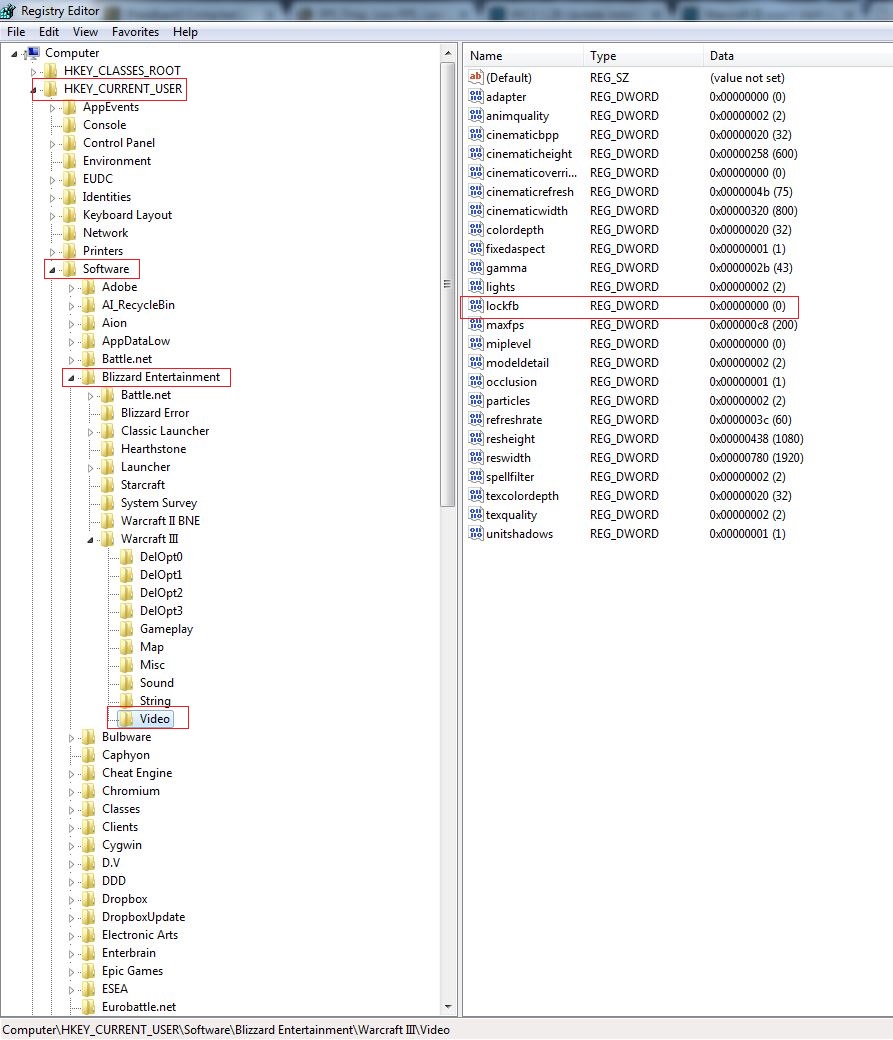
Manually remove FPS restrictionGo to registry (Run>regedit.exe) Then go to this path (image below) : HKEY_CURRENT_USER\Software\Blizzard Entertainment\Warcraft III\Video and change Lockfb to 0 Setting "maxfps" to a number equal to your monitor refresh rate also supposedly makes gameplay smoother. |
| Hosting Under Firewall Windows XP |
|---|
| First you must have Warcaft with PVPGN patch installed.
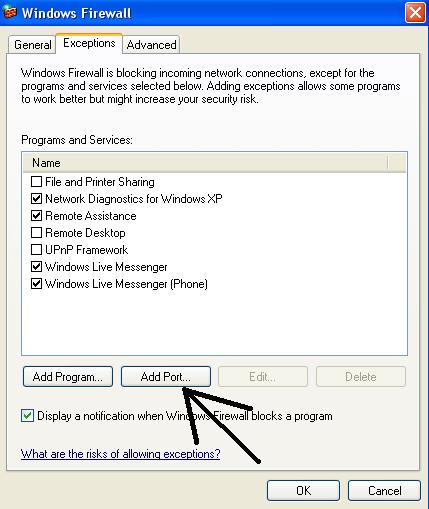
Block All Incoming Connections should NOT be ticked, or else you can't host.
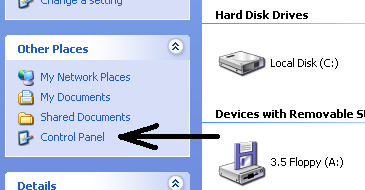
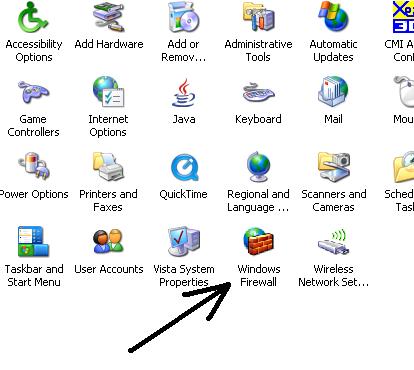
3. You must have Windows Firewall set to ON.
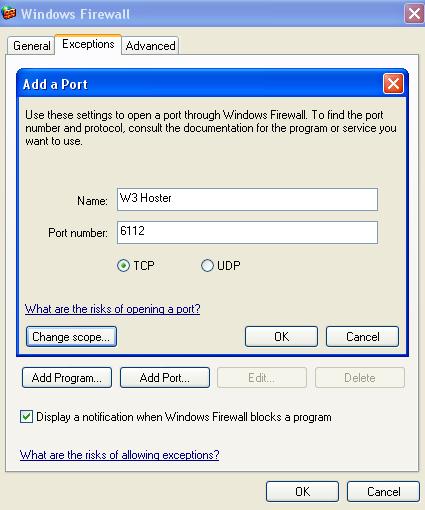
4. Then press Add Port and select:
You also have to add euroloadder.exe and war3.exe to the program exception list.
Now, you're ready to host games on Eurobattle.net! Good luck!
|
| Hosting under Firewall on Windows 7 Tutorial |
|---|
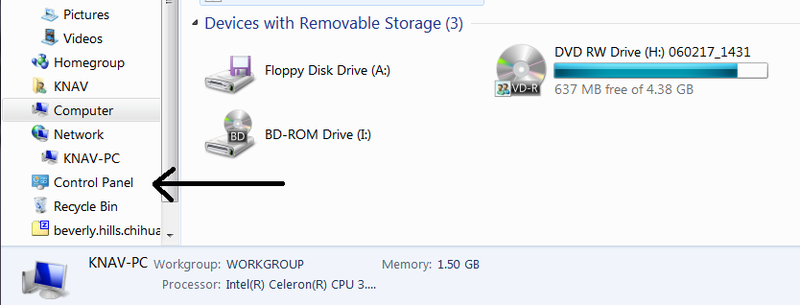
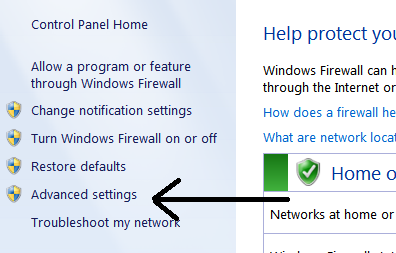
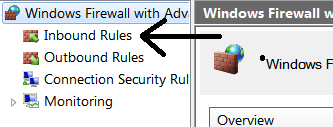
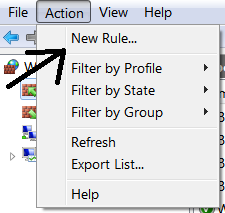
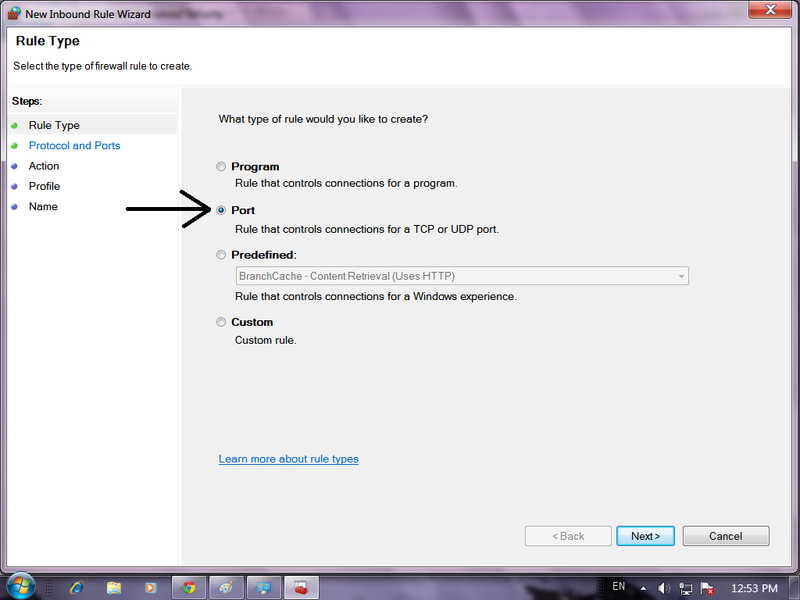
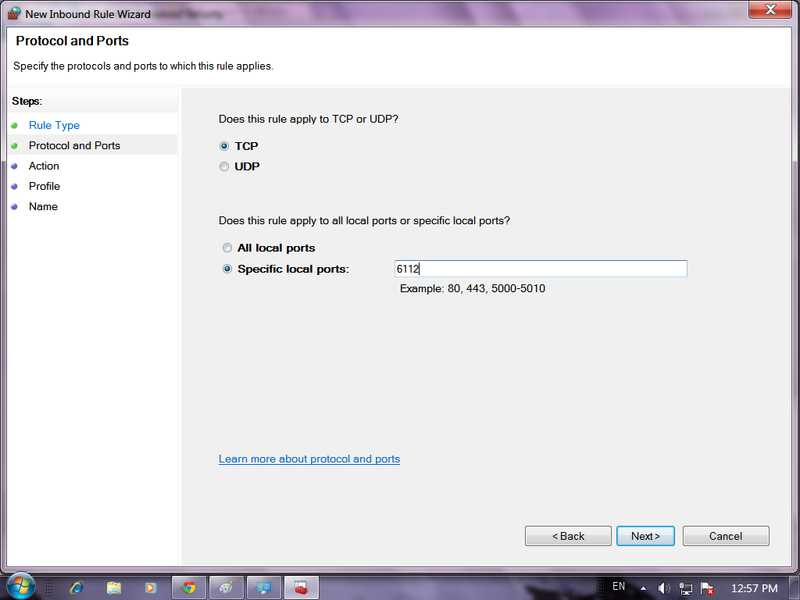
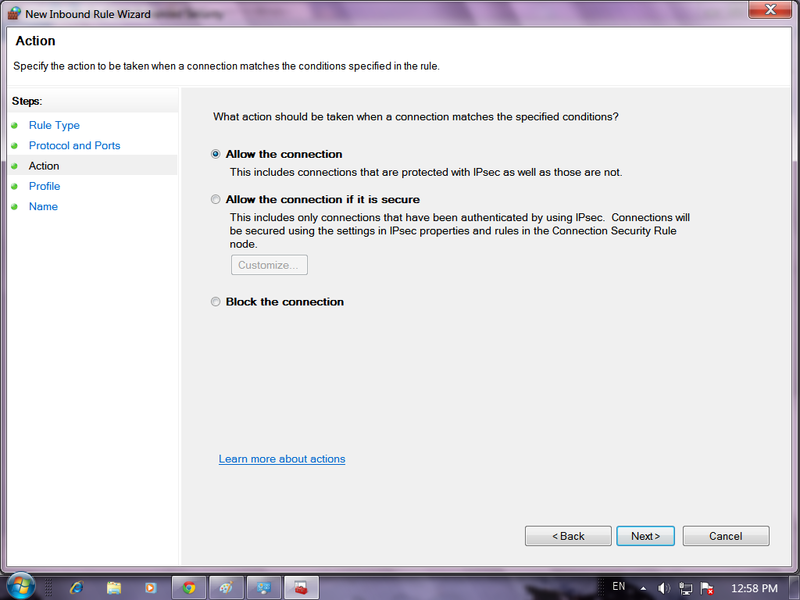
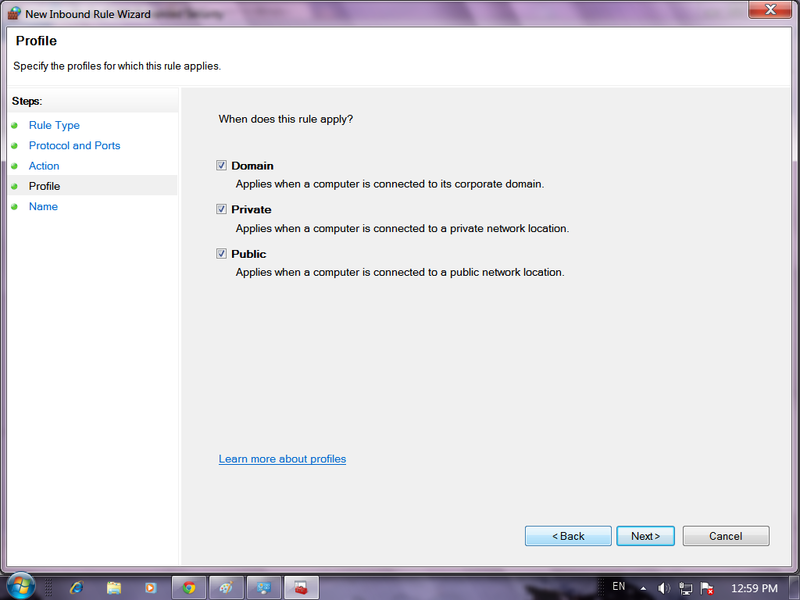
| Here are a few steps so you can host under Firewall on Windows 7
|
| Hosting under Firewall on Windows 8 Tutorial |
|---|
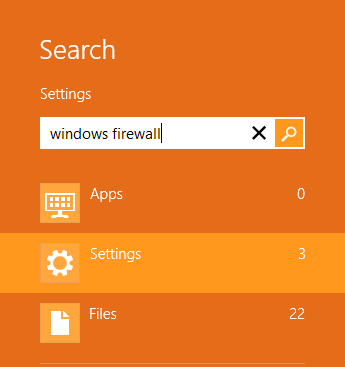
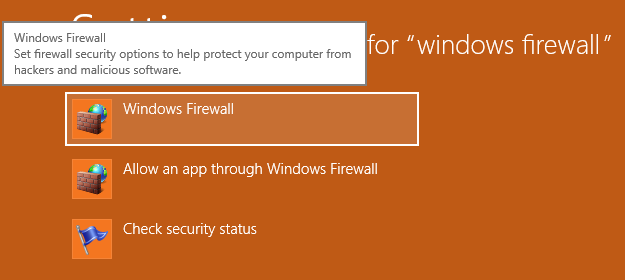
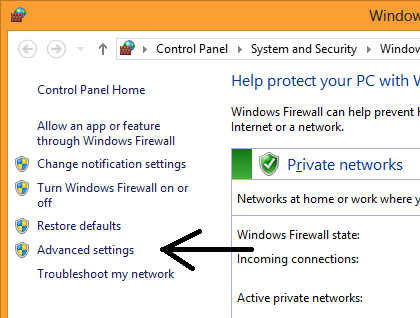
| Here are a few steps so you can host under Firewall on Windows 8
2.Just start typing Windows Firewall 3.Click on settings in the search bar 4.Click the windows firewall icon in the left pane
|
| Portforwarding Router Tutorial |
|---|
| =What is port forwarding and why do you need it?=
Port forwarding (sometimes referred to as tunneling or virtual servers) is the act of forwarding a network port from one network node to another. Port forwarding allows remote computers (e.g. public machines on the Internet) to connect to a specific computer within a private LAN. So in order to host a game online, you must allow public computers on the internet to connect to your computer. If you don't port forward, all incoming connections to your PC will be refused and thus no one will be able to join your game. It is required to have forwarded ports in the following types of games:
Solution 1 (recommended)Ports which have to be forwarded: TCP 6112-6119 UDP 6112-6119
Solution 2(In case solution 1 did not work, this solution contains common steps that can be used by everyone) Hello and welcome to our port forwarding guide.
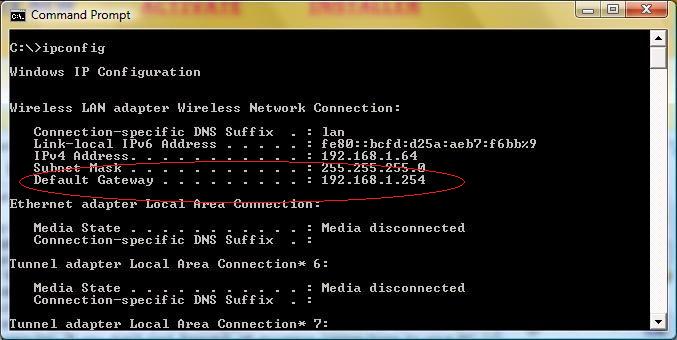
Open cmd.exe (Start > All programs > Accessories > Command Prompt) Type ipconfig, notice the Default Gateway.
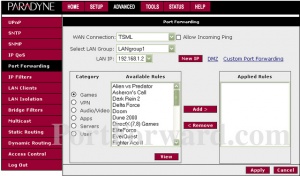
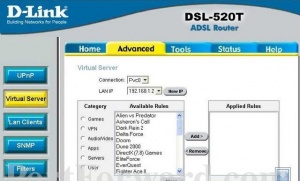
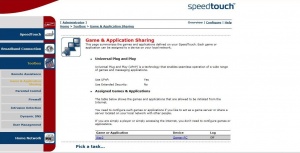
Make sure to forward both 6112 and 6113 (it is recommended to forward 6114-6119 as well). Some routers have Warcraft 3 in their database, so all you have to do is add the Warcraft 3 to the Applied Rules. If you don't have it, create a new application with the following settings: Protocol: Any Port Range: 6112-6113 Translate To: 6112-6113 Or if you don't have "Any" as a protocol type. Protocol: TCP Port: 6112-6113 Translate To: 6112-6113 Protocol: UDP Port: 6112-6113 Translate To: 6112-6113
Search for your router's brand and exact model. Follow the instructions that are specifically made for your router in order to port forward.
|
| Static Internal IP Router Tutorial |
|---|
| A -VERY- important part of setting up a Static IP address on your computer is CHOOSING an appropriate number to assign to the computer as its permanent, “static” IP address.
There’s more to it than just picking any old number at random, and the number your computer has been using up until now may NOT be an appropriate choice. This is because some routers may have trouble forwarding ports to IP addresses which conflict with their DHCP server address range. That is, if the IP address on the computer is the same as one which the DHCP server might assign, the Port Forwarding may FAIL.
So the FIRST step in setting up a Static IP address is to find out what range the DHCP server is set up for, and choosing a number that will NOT conflict with that range.
Log into your router and look for a page that tells what the DHCP Server configuration is. This is usually found under “Advanced Configuration” and then “LAN” (or similar wording). Once you’ve found the DHCP Server page there should be one of two different ways of displaying the RANGE of addresses in the server.
Thus for example if you see: Starting Address 192.168.0.100 Ending Address 192.168.0.150 The “Range” of the DHCP server is FROM 192.168.0.100 TO 192.168.0.150
Thus for example if you see: Starting Address : 192.168.0.10 Number of Clients: 50 The “Range” of the DHCP server is FROM 192.168.0.10 TO 192.168.0.60 (50 addresses, starting at 10)
You must choose a number from 2 through 254 which does NOT fall within the DHCP server range, and which does NOT duplicate the address already being used by the router (the IP address you type to log into the router)..
And in the second example you could safely choose 192.168.0.61, because these numbers are OUTSIDE of the DHCP Server range.
NOTE- This is important! The "Range" of the DHCP server is INCLUSIVE. That means when we say (just for example, your router will probably be different) : Start address 192.168.0.100 End address 192.168.0.150 It means you CAN'T USE .100 OR .150 OR ANY of the numbers between them.
BUT- there IS one situation which will require you to make a change to the ROUTER setup BEFORE you can go on.
Starting Address 192.168.0.2 Ending Address 192.168.0.254 <-- This leaves NO addresses free for YOU to use.
Starting Address 192.168.0.2 Ending Address 192.168.0.200 <-- This leaves 54 addresses free for YOU to choose.
Click the “Apply” or “OK” button, then if necessary, REBOOT the router to make the change take effect.
NOTE: VERY IMPORTANT!! We are picking the LAST set of digits in the IP address ONLY..! The FIRST THREE sets of digits MUST be the SAME as the ones the router and the DHCP server uses. Thus, if YOUR router uses 192.168.2.1, then you MUST pick a Static IP address that begins with 192.168.2 If YOUR router uses 10.0.0.1, then you MUST pick a Static IP address that begins with 10.0.0 Again- we’re ONLY changing the LAST set of digits.
Now that you’ve decided on a compatible Static IP address to use for your computer, follow this link for a guide to setting up the IP address on your computer- However- SKIP the first few steps that tell you to look in IPCONFIG for the IP address, and just use the compatible IP address you've chosen with this guide. Skip ahead to the step (#5 in the Windows XP guide) that tells you to open the Control Panel and follow the instructions from there.
Once you've finished this procedure, the address you decided on, and configured in Windows TCP/IP Network Properties will be your "Static IP Address". Whenever anything asks for your computer's Static IP Address, this number is what it's asking for.
NOTE- If your Internet connection stops working when you change Windows to a Static IP address, the reason usually is that you need to find out what your "DNS Server" addresses are. If you have this problem, read THIS guide for help on that:
|
| Static Internal IP Windows Tutorial |
|---|
| This will guide you to how to set up a static internal IP!
Before you start you need to grab some useful information for later use:
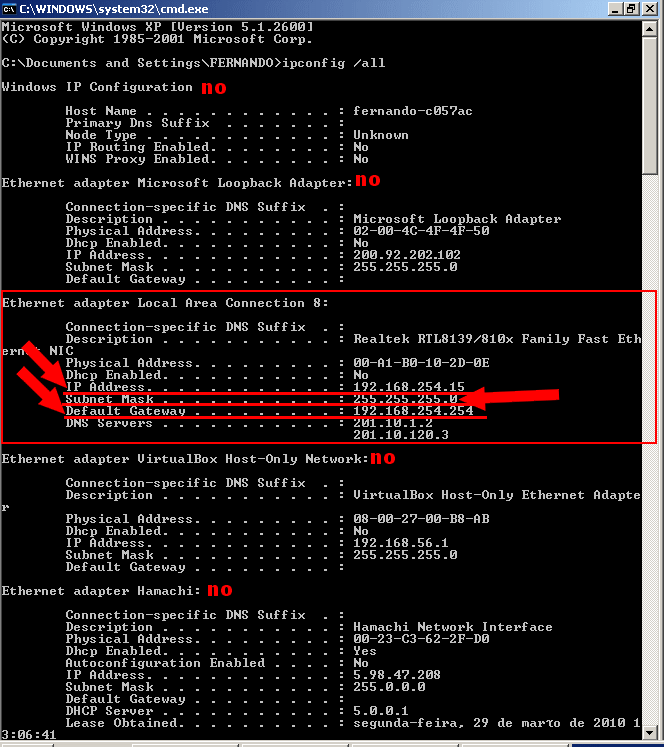
A small window will pop up. Type cmd on it and press enter. A black window will show, then type ipconfig /all and type enter. You may get various data. You must define which one is your real internet connection. On the image below you will see an example:
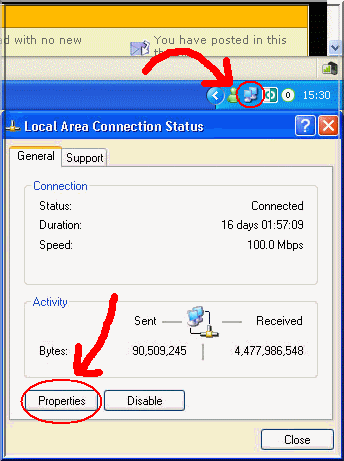
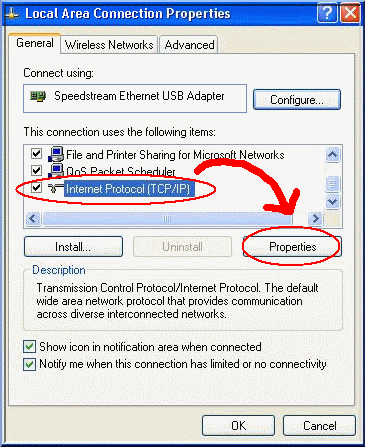
Step 2. Double click your connection on the system tray then click on Properties.
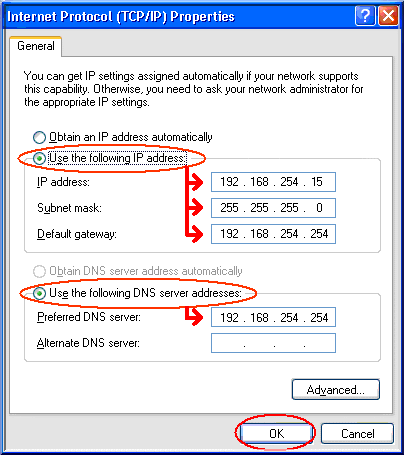
Now you're done setting up a static internal IP! You can now forward your ports to it and be free of problems.
|
| Unable to join LAN game |
|---|
Unable to join LAN gameSo your friend or brother is hosting a game and you can’t join; what to do now? There is a really cool feature in Ghost++, introduced in version 9.x which allows people on same network to play together without any problem. This feature is called the “Admin Game” and was initially designed to do a completely different job. Fortunately for us, Admin Game also solves the joining LAN games problem.
ADMIN GAME CONFIGURATION # whether to create the admin game or not (see readme.txt for more information) admingame_create = 1 the port GHost++ will host the admin game on (this must be different from your bot_hostport) admingame_port = 6114 the admin game password
Note: You need to set admingame_port in ghost.cfg to the port you want to host the admin game on. It *must* be different from your bnet_hostport *and* from your Warcraft 3 port. bot_hostport = 6000 admingame_port = 6114 Enter Warcraft, Options > Game Play > Port should be different (default is 6112)
Unable to join own or LAN game (ADSL users)Hi guys, after few weeks of trying to solve problem of joining your own game, or game created by other machine in Local Area Network (LAN), I finally managed to get it to work. PLEASE NOTE: This solution maybe not work for you! These settings are usually for ADSL users!
The solution for this problem is in general:
|
