Difference between revisions of "Eurobattle.net Client"
| Line 24: | Line 24: | ||
| − | [[Category:Tutorials | + | [[Category:GProxy]] |
| + | [[Category:Tutorials]] | ||
Revision as of 07:33, 3 November 2017
Eurobattle.net Client is a program which lets you connect to our servers. It offers 2 different gateways: normal and gproxy. GProxy is a tool which doesn't let you drop from your game, suspending it if you disconnect and allowing you to reconnect within a set timeout. It also provides protection against cheaters and maphackers. GProxy is required to be able to use LagAbuse.com bots.
Features:
- Disconnect protection
- Antihack system
- Custom icons
- Custom sounds
- Switching between DirectX and OpenGL modes
How to install?
Hello, Welcome to Eurobattle.net - European Warcraft III PvPGN Server. This page contains a short overview of how to start playing here.
Contents
Install Warcraft III
Unfortunately we are unable to provide direct game links at this time, you can:
1. Buy original CDs and patch to 1.28.5
2. Ask a friend
3. With "Download" button inside the client in "Warcraft" tab. Button will turn green and you need to wait for it to finish the download. You can click on the button again to cancel the download. Download is resumable. Only one version can be downloaded at a time. Files are stored in %appdata% directory. A dialog window will take you there on download completion.
Install Eurobattle.net
Eurobattle.net provides its services to all users, no matter if they have a licensed copy of the game or not. If you don't have the license keys, Eurobattle.net Client will provide you with temporary ones which will let you connect to our servers.
1) Make sure that you have Warcraft III 1.28.5 or 1.26a installed on your computer.
2) Download and install Visual C++ Redistributable 2013 and Visual C++ Redistributable 2015 x86 here or from the official Microsoft site unless you have them already. These frameworks are required in order to be able to use our Client.
3) Download the newest Eurobattle.net installer
4) Unzip the installer and launch it.
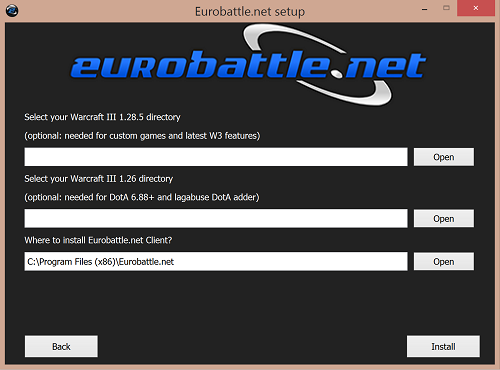
5) Progress through the installation, make sure to select the desired Warcraft III path and the path you want the Client to be installed to:
Note that the path MUST contain only English characters.
6) After the installation has been successfully completed, the Client's shortcut will appear on your desktop:
7) Launch the Client and wait patiently until it patches your game (if necessary). You might be asked to confirm the installation of patches (their size varies from ~50 MB to ~950 MB).
8) Lastly, add Eurobattle.net/gproxy.exe and Warcraft III/w3l.exe to the whitelist in your antivirus (especially Avast is notorious for removing the files silently).
In case you aren't able to connect to our servers or are experiencing other problems, check our Troubleshooting Section before posting in the Technical Support Board on forum.
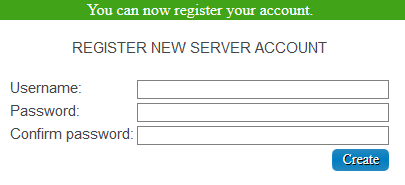
Create a server account
Server accounts can only be created using a special form on our forum. Follow these simple steps in order to create an account:
1) Go to the account creation page
2) Type in your email and complete the Captcha.
Note: Disposable emails are NOT allowed. If you have a legitimate email and it still doesn't let you register, please contact us on forum and we will add it to the whitelist.
3) Check your mailbox, you should have received a confirmation email. click on the confirmation link and it will take you to the account creation form.
4) Type in the desired nickname and password.
You should now be able to login on server using the in-game form.
How to play ladder games
Ladder matches are the basic games in Warcraft III, also known as "melee", "standard" and "PG" games. You play for one of the four races (Alliance, Night elves, Orcs or Undead) and your goal is to build your base and army as soon as possible and eliminate enemy players. Ladder games have their own ladder.
Requirements
To be able to play ladder Warcraft III games it is required to forward 6112, 6113 ports on your router. Since there is no external host one of the players taking part in the match must have his ports forwarded. He will then be the host for that game. If neither of the players can take the role of the host, all players will be disconnected from the game.
Searching for the game
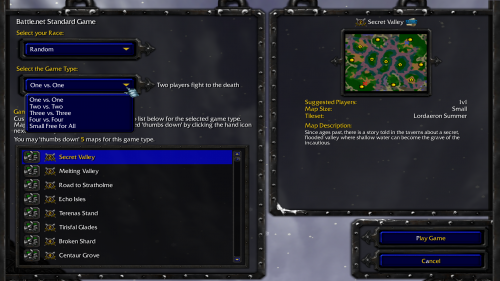
1) After logging in on server, click on the "Play Game" button
2) Select the game type of the game you want to find (1v1, 2v2, 3v3, 4v4, FFA). Click on the "Thumb Up" buttons to remove the maps you don't like from the map pool. Once you are ready, press "Play Game".
3) Wait until your game is arranged (may take a while)
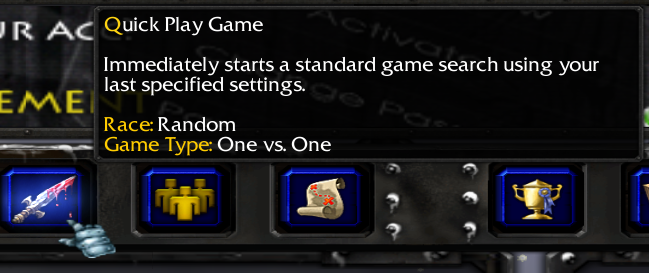
You can also start searching for the game directly from the main menu by pressing the "Quick Play Game" button. The previously selected game settings will apply.
How to play custom games
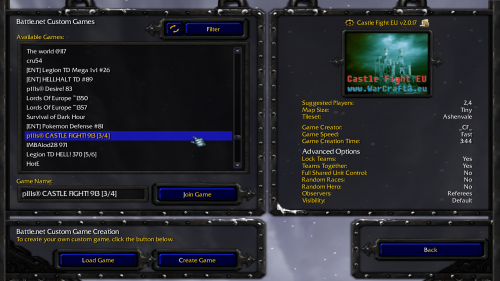
Custom games are all games which aren't played through the "Play Game" and "Quick Play Game" options. They also don't affect the melee ladder. There are thousands of different custom games - DotA, DotA LoD, Castle Fight, X-Hero Siege, Uther Party, Sunken City, Madballs, Invoker Wars, Pudge Wars, Green TD, Middle Earth Risk, Archer Wars and many, many other.
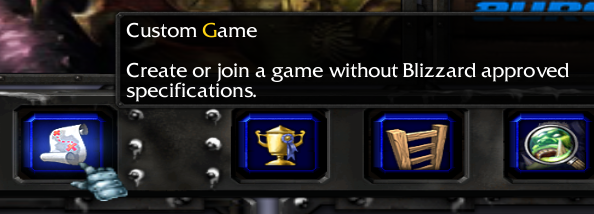
1) After logging in, click on the "Custom Game" button.
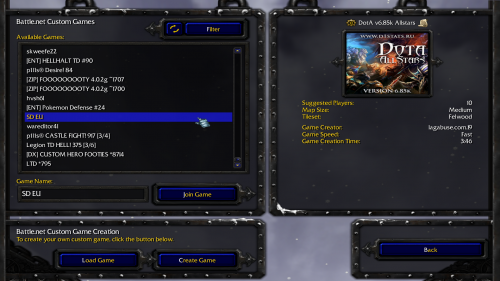
2) Select the game you want to join from the list or type its name in the text box.
3) DotA games are also custom games and can be joined the same way
How to host games on your computer
Requirements
To be able host Warcraft III games on your PC it is required to forward 6112, 6113 ports on your router. This is needed in order to allow the other players to connect to your computer and take part in your game.
Creating game
Coming soon...
How to host games on bots
Hosting with public bots
You can use public hosting bots to create games for you. To use them enter the respective channel or directly whisper the bot using /w command.
Lagabuse.com
- /join la or /join lagabuse.com
- How to host using lagabuse bot
EuroBR.Guard
- /join br or /join Brasil
- http://eurobattle.net/forums/840-Brasil
Hosting on your computer using GHost
You may want to run a special bot which will make hosting easier for you. Since your PC will still be used as the host, portforwarding is required.
Check the GHost section for detailed tutorials about using the GHost/GHost++ bots.
Changelog
The latest change can be found in changelog.txt and the whole changelog in changelog_full.txt in the Client directory.
You can also view it on the Changelog Page.
