Difference between revisions of "Tutorial:Static Internal IP Windows"
| Line 26: | Line 26: | ||
'''Step 3'''. Select TCP/IP Protocol and then Properties. | '''Step 3'''. Select TCP/IP Protocol and then Properties. | ||
| − | [[File:Tcp | + | [[File:Tcp ip prop.png]] |
Latest revision as of 00:05, 17 January 2012
This will guide you to how to set up a static internal IP!
Before you start you need to grab some useful information for later use:
Step 1. Press Start , click Run.
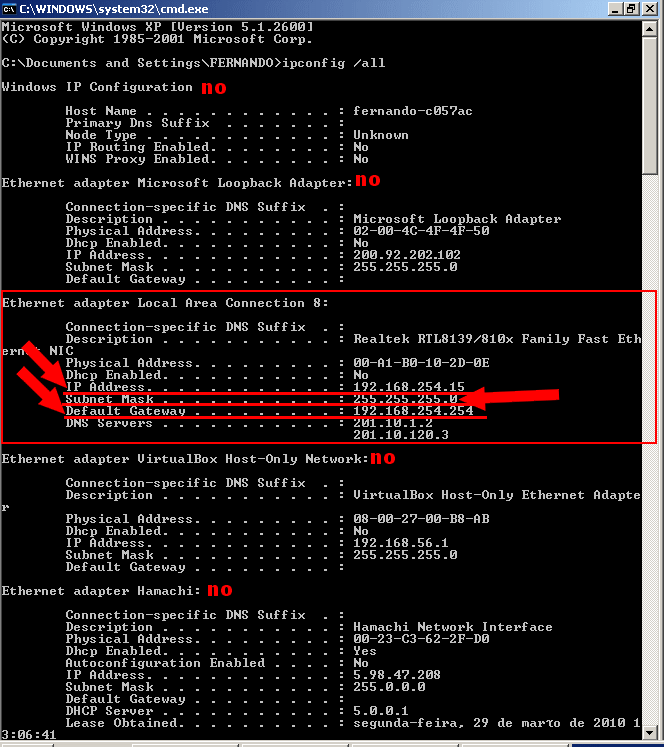
A small window will pop up. Type cmd on it and press enter. A black window will show, then type ipconfig /all and type enter. You may get various data. You must define which one is your real internet connection. On the image below you will see an example:
Take note about the IP Address , Default Gateway and Subnet Mask values, you will need them later.
Now, the beggining:
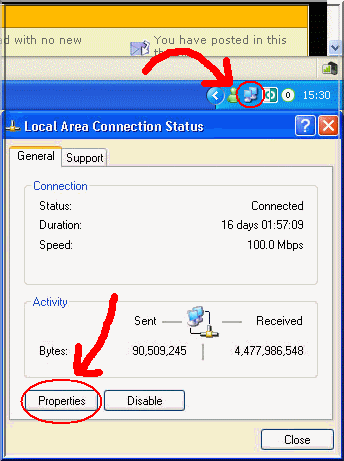
Step 2. Double click your connection on the system tray then click on Properties.
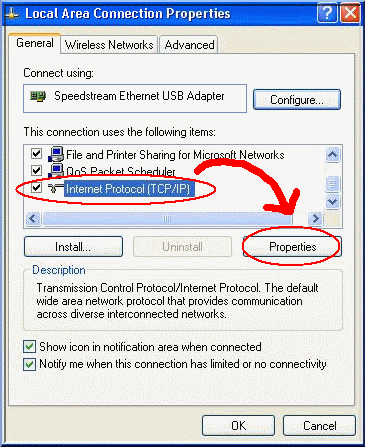
Step 3. Select TCP/IP Protocol and then Properties.
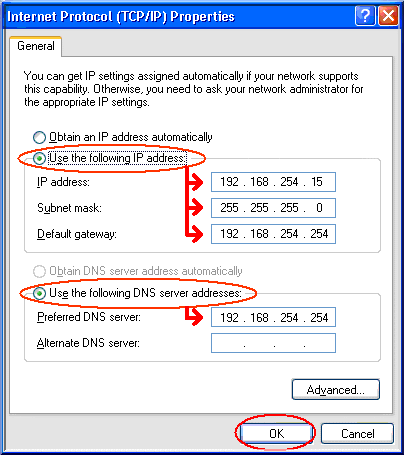
Step 4. Now, mark Use the following IP address and Use the following DNS server addresses. Recover the values you got on the
Step 5 , fill the fields with the information. For DNS, type in the Default Gateway
Observation: in case the Default Gateway does not work as your DNS server (unresponsive internet), you will need to enter your router interface (by typing the Default Gateway into your browser; user and pass admin or blank) and find your DNS information under DHCP settings.
Now you're done setting up a static internal IP! You can now forward your ports to it and be free of problems.


